PORCELAIN BY ANTOINETTE
  • Home
  • Workshops
    • Online Workshops >
      • Understanding Porcelain
      • Porcelain Handbuilding
      • Hand building Porcelain dinnerware
      • Wheel Thrown Porcelain Dinnerware
      • Wheel thrown Teapots
      • Pinching Teapots for Beginners
      • Glazing made easy
      • Pottery for the Beginner
    • International
    • USA workshops
    • Arts in schools
  • Shop
  • About
    • Statement
    • Biography
    • Publications
    • Resume
    • Portfolio >
      • Teapot portfolio
      • Sculpted porcelain bowls
      • Sculpted envelopes
      • Ice sculptures
    • Contact >
      • Frequently asked questions
      • Students comments
  • Blog
  • Glossary
  • Recipes
    • Glaze
    • Clay

Understanding and Preventing Cracks in Porcelain and Other Clay Bodies

1/26/2026

0 Comments


Working With Porcelain: Why It Isn’t Difficult—Just Different

Porcelain is often regarded as a challenging clay body to work with.  Potters who attempted it often like the medium, however some give up not understanding how to handle the medium. They perceive it as fragile, finicky, and tedious. However, my challenging personality and years of experience have led me to a different perspective. Today, I advocate for working with porcelain clay. While it is demanding,  the rewards and benefits make it all worthwhile. 
My Early Journey With Porcelain Clay
My first experiences working with porcelain, was unsuccessful. To make it worse, more experienced potters and instructors  intimidated me. In my early days of pottery I created simple forms, fired to cone 8.  
Much of my early porcelain work ended up in pit firings. I created incredibly thin porcelain pieces that were fired in pits. These works eventually helped me secure permanent residency for my family and me in the United States.  
Those early works evolved into sculptural pit-fired pieces that carried my emotions during a time that I was still griefing the loss of leaving my home country,  South Africa.
​Eventually, the heaviness lifted. I began seeing light, movement, and ballerinas in sheer dresses in my mind’s eye. Southern Ice porcelain became my medium of joy. Translucency, color, and light became symbols of the future.


Why Porcelain Cracks: Understanding the Real Causes 
Cracking in porcelain isn’t random—it’s usually caused by handling, design, firing, or glazing mistakes, to name a few.  Over the years, I’ve seen every kind of crack imaginable, both in my own studio and in work sent to me by students from around the world through TeachinArt.com.
Let’s break them down.
A hand-built porcelain sculpture by Antoinette Badenhorst featuring two parts. A small, round, white bowl with a green interior and a jagged rim sits within a larger, flat, white porcelain sheet that resembles a leaf or a large petal. The bowl has a small V-shaped opening on one side.
Sometimes, certain cracks are intentionally allowed. In this case, Antoinette Badenhorst stretched the clay over the balloon while it was being made. The bowl edges cracked. She, stopped it from going too far and enhanced the crack to give the bowl an organic appearance.
The underside of a cup with a s-crack.
S-cracks are easily formed when throwing off the hump. It’s essential to ensure that the bottom of bowls thrown in this manner are compacted properly.
This is a hand-built, altered porcelain bowl by South African ceramic artist Antoinette Badenhorst.  The artist specializes in translucent porcelain pieces, often featuring carved exteriors and glazed interiors, which form part of her signature work. Each piece is part of a larger theme of
Antoinette Badenhorst’s beautiful, translucent, sculpted porcelain bowl was photographed during a workshop in Simonstown, South Africa.
Porcelain isn’t difficult. It’s different.
Unlike stoneware or earthenware, porcelain is worked as clay but becomes something closer to glass when fired. Understanding that single truth changes everything about how you handle, design, and fire it.
A one-of-a-kind, wheel-thrown, altered, and carved translucent porcelain bowl. The sculpture features a flared, organic shape with multiple vertical folds resembling stylized leaves or petals that twist upwards from a narrow base. The exterior is a matte, unglazed cream or pale yellow color, while the interior is glazed in a smooth, glossy, pale lime green or yellow hue. The thin porcelain walls allow light to pass through, highlighting the delicate structure and the contrast between the exterior and interior colors.
One of Antoinette Badenhorst’s exquisite sculpted porcelain bowls.
Handling Cracks in Porcelain: What to Do and What to Avoid
Porcelain becomes extremely fragile as it dries because it contains less clay, than stoneware or earthenware. 
Key rule:
* Finish shaping and altering porcelain before it passes the leather hard stage
When porcelain starts changing color as it dries, it’s  too late to alter the clay without causing problems. 
How to Prevent Handling Cracks
  • Trim as soon as the base and rim are evenly moist.
  • Be extra careful with rims—they crack under  little pressure on the wheel head. 
  • Handle the semi-dry porcelain carefully. Even if you are successful in fixing a crack, it may show up in translucency. 
A translucent bowl that show how a fixed crack looks in translucent porcelain after is was fired.
This crack was fixed, however because of the particle alignment, it still shows in the translucent pot.
Showing the handle of a tray that cracked due to lack of particle alignment.
The cracks in one of Antoinette’s students’ trays were caused by weak particle alignment.
​Why Porcelain Handles Crack (And How to Fix It)
Many potters struggle with porcelain handles. The real culprit in most cases is particle orientation.
Clay shrinks in unison only when its particles are aligned and compacted evenly. A handle, unconditionally of the way it is formed,  has its own direction of particles, and when you attach it to a mug, it’s like two traffic flows meeting head-on.
You need an off-ramp.
How to Attach Porcelain Handles Successfully
  • Score and wet thoroughly. (remember slip particles are diluted and in disarray!)
  • Attach when both parts are equally moist
  • Compress and blend the joint well
  • Think about handles as foreign objects that must become unified with the form
If cracks still appear, look at possible mistakes in your design and firing schedule, not just the joint.
Sketch that shows how a potters should visualize the alignment of particles.
A diagram illustrates the flow of particles when a handle is attached to a porcelain mug.
Picture
This is a good example of particles in the handle of a mug that were not aligned with those in the mug wall.
Picture
The vase’s spout, too heavy for the sheet of clay it was attached to, tore and cracked open.
Firing Cracks and Dunting in Porcelain
Dunting happens when the kiln heats or cools too fast. It can occur in bisque or glaze firing.
If a piece comes out of the kiln split cleanly in two, or cracks days later with sharp, glassy edges—the cooling cycle is usually to blame.  
Dunts in bisque ware is not   common in porcelain clay, but glaze cracking happens often.  
How to Prevent Firing Cracks
  • Slow down your firing and especially the cooling schedule
  • Pay special attention to cooling around quartz inversion
  • Don’t rush porcelain through temperature changes
Preventing Design Cracks in Porcelain Work 
Porcelain must be formed evenly. Uneven thickness leads to slumping, tearing, and cracking.
At high temperatures, porcelain becomes  pyro plastic — it softens like glass. 

Design Tips for Porcelain
  • Keep walls consistent in thickness
  • Avoid heavy areas attached to thin ones. 
  • Heavy clay will be drawn towards the kiln shelf and will drag thinner clay along with it. 
A golden crystalline plate that broke in 3 pieces due to uneven firing.
This beautiful crystalline plate, exposed to uneven cooling in the kiln, broke into pieces.
This is a clear image of a dunting crack because of too much glaze on the inside of this bowl.
The glaze applied to the bowl was too thick, causing it to break into two pieces. This is a very clear example of dunting.
Over-Glazing: A common Cause of Porcelain Cracks
Too much glaze—especially inside forms—can split porcelain apart.
If glaze pools thickly in the bottom of bowls or vessels, it creates stress during firing.
​
Glazing Tips for Porcelain
  • Apply thin, even glaze layers
  • Avoid heavy pooling, especially  in the interior bottom of thin pots
  • Spray glazing is an effective technique for applying  glaze to thin porcelain. 
Spiral Cracks in Wheel-Thrown Porcelain
There’s a  misconception that porcelain must be thrown fast to prevent collapse. In reality, it’s advisable to throw porcelain slowly, with a deliberate focus on compacting the clay particles. Spiral cracks occur when certain clay parts remain misaligned and shrink unevenly. These cracks mostly become visible during the final firing process.

How to Avoid Spiral Cracking 
  • Throw slowly and meticulously. 
  • Compression should be applied uniformly to the entire object, including its interior, exterior, and base, considering both the inside and outside. 
  • Don’t rush. Form your pot deliberately and carefully. 
​General Tips to Prevent Base and Rim Cracks
  • Trim thin porcelain before it gets too dry
  • Attach a  a sponge bat on the wheel head to trim delicate rims on
  • Compact the base inside and out
  • Keep wall thickness even throughout
Sketches showing what various cracks look like.
These sketches from Antoinettes porcelain online classes illustrate the various cracks that may develop in porcelain due to uneven drying.
A crack showing on the inside of a dried bowl.
Is the lack of compression on the interior of the bowl due to insufficient compression, or could it be that the area where the wall and base meet was left wetter than the rest of the bowl?
Spiral cracks showing on this white bowl with leaflike decoration.
These are typical spiral cracks that either went unnoticed during the bisque kiln firing or occurred early in the glaze fire.
Small cracks on the rim of this porcelain bowl.
Tiny V-cracks have appeared on one of Antoinette’s students’ bowls. If these cracks are detected in time, they can be repaired.
Sketch showing what spiral cracks look like.
The sketch depicts a bowl to the left, with clay particles that were not uniformly compressed.
Dunting cracks showing on this wheel thrown porcelain plate.
This plate was subjected to uneven heating and cooling in the kiln, resulting in dunting.
  • Antoinette Badenhorst, a renowned potter, presents online classes and hands-on workshops worldwide. In 2014, she and her husband, Koos, founded TeachingArt Online School of Art. Together with other experienced and renown teachers, they provide comprehensive online courses for potters and artists globally. These comprehensive learning experiences are meticulously designed to enhance skills, boost confidence, and foster a deeper understanding of pottery, rather than offering mere demonstrations. 
This crack was seen on the bottom of a vessel before it was fired.
This crack is related to s-cracks and due to uneven drying.
This little porcelain cup cracked from the rim almost to the bottom.
This little cup was made by one of Antoinettes students. It looks like the crack was formed during firing. The glaze curls into the crack, therefore this is not dunting from the glaze firing.
Typical s-crack on the bottom of a cup.
This crack likely occurred because the base was drying on a non-absorbing bat. Alternatively, it may not have been cut loose from the bat after it was thrown.
The sketch shows how a v-crack look on a mug when the rim dries faster than the body.
The sketch from Antoinettes online classes with TeachinArt illustrates a V-crack that forms when the rim dries more quickly than the base.
This cup shows a dunting crack that appeared after it was used for a while.
This crack is most possibly due to glaze that was too thick for the body.
 If you enjoyed and gained something from this blog post, please share it with your friends. Unfortunately, I won’t be traveling abroad this year because I need to catch up on my studio work and am also writing a book. 
Details of my next ​porcelain workshop is available  on the Workshop page
TAGS
porcelain clay, working with porcelain, porcelain pottery, porcelain cracking, porcelain firing, porcelain handles, wheel thrown porcelain, translucent porcelain, porcelain glazing, how to prevent cracks in porcelain
0 Comments

Kilns suitable for porcelain

5/4/2021

1 Comment

 
Picture
Picture
Picture
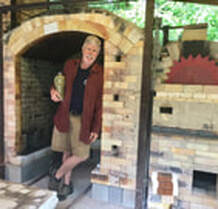
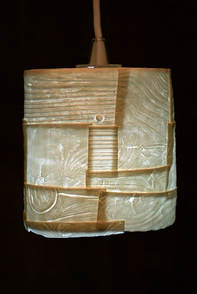
David is one of the instructors at Teachinart. See his profile here: Click on the image to go to his profile.
​Kilns suitable for porcelain
Now that we established the concept of what porcelain is and how it differs from high firing to low firing porcelains, it is easier to decide what is a suitable kiln to have. The picture is of David Voorhees at his kiln.  If you are a truest, believing in only high firing of porcelain, you may also just believe in wood firing, the original firing process in which porcelain was developed in the days that it was still a secret known only to the Chinese.
If you are only looking for a strong good and reliable clay experience with the true appearance and qualities of porcelain, any cone firing from cone 6 to 10 should work. Beyond those two firing temperatures, your challenges get bigger.

Firing higher than 1285 C (2345 F), requires stable fluxes to work in relation to the refractory silica and kaolin and catalyze it to melt the clay to glass, but to still allow it to retain the form. To my knowledge there are no support for electric pottery kilns that goes that higher than ^ 12- 14 (if you know of any manufacturer that create ^14 and above electric kilns, please share the information with me) ​
Picture
Pot by David Voorhees
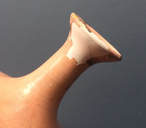
Going below 1220 C (2228 F), can be fired in any pottery kiln, but at this stage the fluxes must also be able to melt at that lower temperature. That is very possible, especially with frits, a factory produced flux that is expensive, but readily available. The problem is that silica and kaolin are both highly refractory, unwilling to melt at such a low temperature. Therefor the heating process must be even, allowing for an even spread of heat and even conversion of silica throughout the mass. Neglecting this process will lead to a surplus of free quartz that will weaken the final ceramics, in this case porcelain. A balance between time and heat, which is possible to manage in a longer cycle of a high firing process, will be more challenging in low firing, which is normally shorter. Therefor an atmosphere of a slow enough firing cycle is needed to allow for and even mingling and integration of silica and alumina with the fluxes at a lower temperature.  ​
PictureOne of the clay tests that I did in which the flux was too powerful.

The best comparison to the process, is a cake, baked golden brown on the surface but with an unbaked interior.
A fine balance of raw materials is needed, complicating the recipe and the chances that one of these materials, may become unreliable when changes in the mining process takes place.
To obtain translucency at such a low temperature requires more glass-maker and just a small amount of clay, which forces the clay into a less pliable state. Bentones (macaloid, bentonite vee gum T), may be the only solution to improve workability, but these plasticizers bring its own set of possible problems, a topic that falls out of the scope of this post, but that may be discussed in future.  
It may be a good time to refer back to soft paste porcelain Chicago images, which is traditionally not as strong as hard paste porcelain.
Anyone interested in working with clay should choose the medium and firing requirements first and then decide on which kiln to buy. Porcelain, in general do have its own requirements for firing, whether it is a high firing or low firing porcelain. I describe some of these requirements in the blogpost  "Slow firing of porcelain in a pottery kiln". 
​

​It often requires down-firing. Frank and Janet Hamer described it in “The Potter’s Dictionary of Materials and Techniques” as “a thick body-glaze layer”. Due to its glaze-like nature, described in by as “a thick body-glaze layer”. Due to the fact that the clay and glaze matures at the same time, it builds a very strong bond by the clay body compressing the glaze. A simple explanation is that the clay prevents the glaze from stretching too much, prevent it to craze, thus the stronger bond. Too much compression will cause shivering. 
Picture
Terra sigilata shiver off the clay body
Shivering of the fired glaze will take place when contraction of the clay is severe, appearing like a paint chip, reveling the clay below. The underlying problem is similar to crazing in which glaze and clay body do not fit together.

Crazing happens when glazes cool down too fast and contracts faster than the clay itself.  This is the exact reversal of what happened when it fired up and often referred to as a bad clay/glaze fit. Cristobalite (silica crystals) in the glaze contracts more than 3 %.
Picture
Porcelain cup with crazed glaze.
Picture
Note the seperation in the bowl from the glaze. In this case the glaze application was too thick.
​Dunting is the process in which the cool-down process is happening too fast, causing stress in any dense pottery. The upper part of the pot may start to cool faster in the kiln atmosphere than the base that touches the shelf below, which is cooling much slower because it retains heat longer. Uneven contraction resu
Porcelain is considered a dense ceramic material, as it contains 10% +cristobalite from silica present in the clay. Body and glaze contract together during the cooling, compressing it into a strong bond. If the critical cooling periods around 573 C (1063 F) and again around 226 C (439 F) when free quartz and cristobalite needs to contract in concert with each other at the same slow rate, is not slow enough, the tension build up will weaken and break the body in two, many times long, sometimes even weeks after the work is cooled. 
In the USA and in many other countries that I visited before, are many manufacturers, making high quality electric pottery kilns. Unless poorly designed, any of those should be suitable to fire porcelain. Higher firing, refractory materials for kiln bricks and kiln furniture may be used for cone 10 kilns, maybe allowing to last a little longer when it is used at lower temperatures than the temperature it is intended for.
Due to the need to control the cooling of porcelain, it may be wise to buy a kiln that has the facility to control the firing down process. Electronic controllers are very handy, but a potter can also make sure that all vents are properly shut closed after the initial cooling in the kiln started to happen. The kiln will reach a temperature around 1000 C (1822) when the kiln turns to a yellow orange color, which is a good time to close all possible vents, prevent drafts and instant cooling in the kiln. 
Resist the urge to open the kiln when the heat is above 200 C (392 F) and even then, prevent sudden airflow into the kiln. It is not worth all the trouble and long hours, just to see how a fine piece of porcelain fall apart on the kiln shelf, or worse, weeks after you sold it to a valued customer. ​
Picture
Kiln controler to make sure the speed of the firing is under control.
Picture
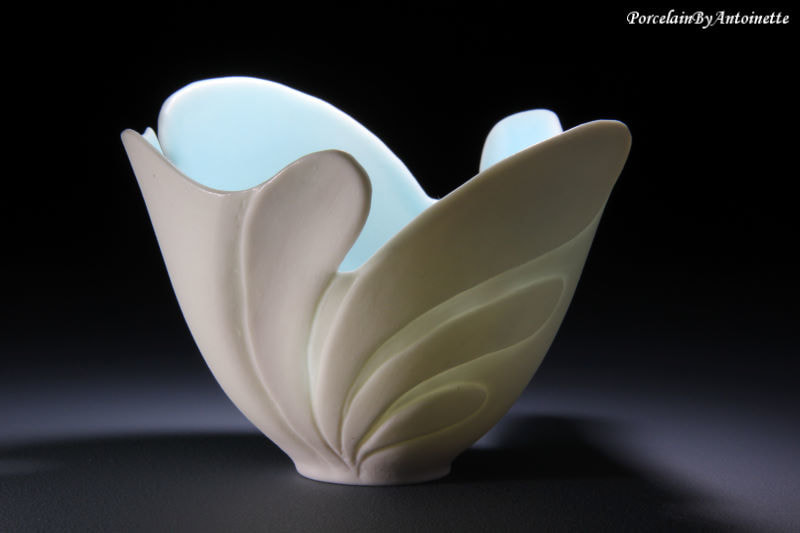
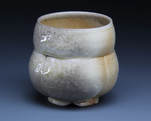
Low fired Porcelain by Bryan Hopkins.

RSS Feed

1 Comment
    Blog

    Categories

    All
    Agateware
    Arts Integration In Schools
    Begin A Pottery Business
    Clay Flute
    Clay Slabs For Dinnerware
    Colored Clay
    Cracks In Pottery
    Destruction Of Art Or Creating Art
    Figurines
    Glazes
    Kilns Suitable For Porcelain
    Kitchenware
    Mississippi Arts Commission Fellowship Report
    Ocarina
    Online Porcelain Workshop
    Painting
    Pinching Clay
    Porcelain Tips
    Porcelain Workshops
    Pottery In Pretoria
    Salt In The Pitfire
    Throwing On The Pottery Wheel.
    Understanding Porcelain

    RSS Feed


Online workshops
Understanding Porcelain ​
​Hand building Porcelain
Hand building porcelain Dinnerware
Wheel throwing Porcelain Dinnerware
Wheel thrown Teapots
Pinching Teapots for Beginners
​
Glazing Made Easy
​Pottery for Beginners
​
Pinching Porcelain Teapots
Porcelain hands-on workshops
Workshops in the USA
International Workshops
Social media
Facebook 
Google Business
Instagram 
LinkedIn
Pinterest

TikTok
​X.com
Contact Antoinette

  • Home
  • Workshops
    • Online Workshops >
      • Understanding Porcelain
      • Porcelain Handbuilding
      • Hand building Porcelain dinnerware
      • Wheel Thrown Porcelain Dinnerware
      • Wheel thrown Teapots
      • Pinching Teapots for Beginners
      • Glazing made easy
      • Pottery for the Beginner
    • International
    • USA workshops
    • Arts in schools
  • Shop
  • About
    • Statement
    • Biography
    • Publications
    • Resume
    • Portfolio >
      • Teapot portfolio
      • Sculpted porcelain bowls
      • Sculpted envelopes
      • Ice sculptures
    • Contact >
      • Frequently asked questions
      • Students comments
  • Blog
  • Glossary
  • Recipes
    • Glaze
    • Clay