The relaxing effects of clay.Pottery is considered a messy activity. That is true; after all, it is a natural material from the earth. Consider a day out in the garden or on the beach. Few things can satisfy human well-being like an opportunity in nature and not to worry about appearances. This can be very relaxing. Cleaning up the mess may be a reluctant activity, but helps to develop a sense of hygiene and eventually a satisfactory experience in children. A great example is hand washing before a meal is served, which helps enforce what we are drilling into our children all the time. The natural character of clay can have a similar effect on any child; its relaxing and calming effects are instrumental in attention span development.
Early development of skills in young childrenClay handled in its most basic way, often presented as a mud puddle in the garden, benefits children from a very young age. It is a combination of learning experiences that all begin to happen at the same time. They find out clay is malleable. By rolling, pinching, and poking clay, students develop hand-eye coordination. Add to that tactile exploration and children get early sensory experiences. They begin to develop spatial relationships, receive their first geometry lesson, and are confronted with their first cause-and-effect principles. As soon as a child touches clay, their observation outside their normal protected world begins to develop. The clay is wet and cold, makes squishy sounds, smells like mud, and then....is so much fun! It may have a sandy or slippery texture that may be an unpleasant experience at first, but once they find out that messy is good, they want to explore it. Play with clay allows for learning on the most basic level with no external interference. When a child is relaxed, they are open to information. The next step is clean-up, which addresses discipline and sequencing of events; more layers of skills are added to the learning curve. Developing motor skills
Handling clay is a physical activity that helps to develop small and large motor skills in kids. Larger muscles learn to be controlled when a ball of clay requires slamming and pressing down. To control those larger muscles, they sometimes have to get up and come with force down on the clay. Smaller motor skills come into play when their fingertips attach and smooth out small areas where they join one piece of clay to another. When older students prepare clay to work on a pottery wheel, the wedging process of clay helps to develop large motor skills further, while wheel work helps to refine small motor skills. The handling of pottery tools teaches students how to have more control over their motor skills. With pottery tools students must develop a depth perception of the thickness of a piece of clay and how to control the tools to prevent mistakes. Clay is soft when kids work with it, very different from paper. It is easy to poke a hole right through the clay. Drawing a line in clay, or slicing into it, provides a certain degree of resistance. This resistance teaches students to gain a different type of control. The beauty of it all is that mistakes can be fixed. Planning and Solving mistakes.Mistakes with tools happen easily but clay provides opportunities for repair which adds another layer of learning; to fix mistakes easily, adding another layer where they gain confidence. Therefore they learn from a very young age not to be scared of making mistakes, since there is a solution: make a plan and solve the problem by experience. There are few things that makes our children so proud as when they can say the did something all by themselves.
Working with clay is therapy.Clay can be therapy for students of all ages. For example, a 6-year-old kid who struggles to form letters and numbers correctly and who cannot write consistently on lines on paper, may be frustrated with a low self-esteem, which may spiral deeper into a lack of cognitive receptiveness. Soft, responsive, clay is very appealing to children who struggle with control over a pencil and writing. Such children will gain confidence as they begin to feel that they can move the clay in any direction that their hands command. They can tear it apart, squish it back together, and slam it back and forth, using tools to make marks, slice it, and add it back together. Not only does it strengthens those motor skills, but it takes the frustration and the sense of failure away. Imagine how they can tell that to each other and become proud of their successes. So mesmerized by this funny material, they begin to realize that they can manipulate clay and have control over it. That leads to a rise in their self-esteem and now they begin to plan what they want to do. They begin to discover what they can do with the clay and soon, they begin to succeed. It is never too late to introduce children to clay. Anxiety and other related issues dissolve when they explore clay and begin to see what they can achieve with it. Pottery in schools helps to develop the whole child.While any other clay will be useful, pottery clay has the potential to benefit students in many more areas than what is discussed in this blog post. Antoinette will discuss how pottery clay affects imagination, cognitive development, planning, problem-solving skills, language, communication and social skills, attention span development, and the calming effects of clay in a follow-up blog post All and all this is an extensive topic, suitable for arts integration and very worthy for any teacher to take notice of and explore for their students.
In the series of images above, Jaydin planned this sculpture, using wheel thrown and hand built elements and assembled it together into one sculpture over several days. He had to test and add new pieces, broke parts away and reorganize the elements until he was happy with the end results. In some instances we had to hold our breaths, experience disappointments and took on new challenges. The end result was well within what could be expected from a 10 year old student. He was fortunate that he had Antoinette's direct and full attention, but imagine a class group all working on a sculptural project like this. Not only will they be able to plan, but they will be able to communicate and encourage each other. They will build confidence and perseverance among many other skills that will be discussed in a next blog post about using pottery clay for arts integration in schools. Antoinette is certified as a Teaching Roster Artist and is available to help teachers to use real pottery clay in their school classroom as an approach to teaching. Through Arts Integration she collaborate with K12 teachers to give their students a better understanding of any class subject. Antoinette uses the creative process of clay to connect with subject areas in schools.
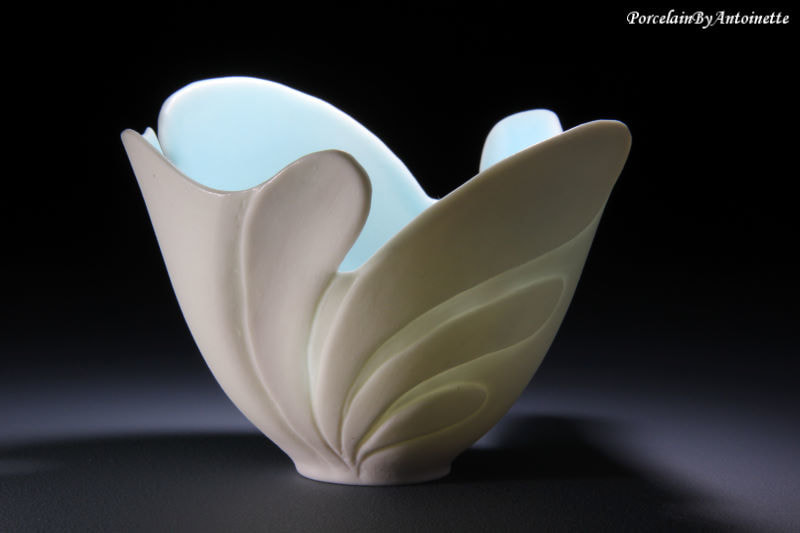
Paperclay is her preferred material, because it can be used in any school as an artform, regardless of the availability of a pottery kiln. The objective is to keep building and developing the whole child whether it is in or outside of the classroom.
0 Comments
An Approach to learning.There are at least 8 ways learners process and retain information. The traditional way of teaching in schools often does not encourage all the students to use their best learning skills. Unless the teacher is equipped with extra time and abilities to let students learn in ways that suit their unique personality traits, some of them may stay behind, and feel incompetent, incapable, and unintelligent. This often affects their well-being and easily leads to behavioral problems. Children who feel smart and competent are eager to learn and feel happy and successful among their peers. They will embrace all opportunities and work their way through challenges. The discouraged student will give up. In this blog post, I will use clay activities to explore and discuss an approach to learning; how it benefits learning strategies on various levels and ages, and how teachers can introduce pottery to students, without the need for a pottery studio. I will begin to discuss the benefits of integrating pottery into early childhood development and how clay activities assist in their development. . Let's back up: how is clay beneficial?
When I first started doing pottery, I was strictly attracted to the material; the holistic nature of working with clay, and the challenges of holding a fired pottery object in my hands. I did not have any idea of how healing and beneficial this medium can be for any person. Children were always attracted to my studio. While growing up, my own 3 girls were around me all day long, pounding, poking, rolling, and building with clay. Their friends joined the fun and they were busy for hours without me having to watch over their shoulders. As the years passed, I learned more from working and teaching pottery classes than I ever thought possible and it turned out to be like a termite nest; what is seen on the surface and what goes on below, are 2 completely different things. Pottery draws people in. It captivates and mesmerizes them. The more a student creates clay objects, the more the clay helps to develop their skills as they learn to be in control of the clay. They learn to communicate better, to self-express better, to solve problems, and in the process build self-esteem. Pottery activities are the one thing that keeps building back to the person manipulating it, making it a perfect tool to integrate into schools. Today, my knowledge and experiences about the benefits of students learning through clay activity are concrete and widely backed by research. Pottery as a visual arts solution for schools.
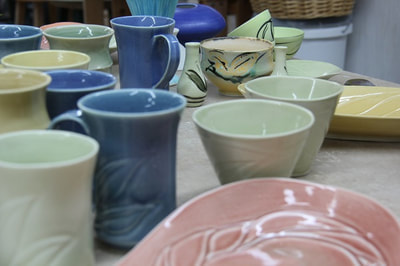
There are a wide variety of artistic activities benefiting children and their learning abilities. Most are suitable to incorporate in the classroom and each of them can encourage children to find their preferred way of learning. Pottery is a visual art activity. Students can begin to play with clay from a very early age. As soon as a child understands not to put clay in his or her mouth or throw it around, they are ready to discover clay. Having the potential to create 2 and 3-dimensional art with this shapeable material, makes it more versatile than many other types of visual arts. Spatial relationships, geometry, and cause-and-effect principles become very early on natural learning curves for these young kids. Playdough and similar commercial sculpting mediums are colorful and attractive to children. In contrast, pottery clay is an unattractive brown or gray, which at first may appear to be a disadvantage, until one realizes that choice-making is a crucial part of the growing process. Pottery clay needs ceramic stains and glazes or acrylic paints to add color in the final finished product. The ability for students to have control over color, adds a diversity component to pottery clay, which is often suppressed in the cookie-cutter world that we live in. It has an open-ended character providing students with a 3-dimensional canvas with permanent qualities. Students who enjoy clay at an early age will be able to create permanent pottery work as they get older, holding the promise of self-worth, a strong element in learning success.
The use of Paperclay is a cheap alternative to learning arts in schoolsDue to budget cuts, teachers often work with minimal artistic materials. Pottery clay is cheap and unfired pottery clay can be recycled multiple times. The same ball of clay can be used repetitively, as long as it is kept soft with water, stays uncontaminated, and rests in plastic after it is being used. In some areas, especially Mississippi, clay can be dug up from the earth, adding another learning opportunity for, especially older kids. Few art mediums stimulate growth and skill in children in the way that clay does. Maintaining and reclaiming used clay correctly makes it one of the cheapest mediums to introduce into the school classroom. Teachers are often under the impression that they need a pottery studio set up, and access to a kiln in the school to do pottery with students, while all that is needed are washable tables, water buckets, clay, found objects that may serve as tools, and a teacher willing to let students play and explore clay. Paperclay is a clay medium widely used among potters. The added value of this medium is that it does not have the same technical and scientific demands that other pottery clays have. The paper fibers provide added strength during the making and its forgiving qualities allow students to focus on the project. Although it is regular pottery clay, the added paper, makes it a medium suitable to add wet to dry clay, and allows for fixing mistakes after it has been through the kiln. It can be fired to become true pottery objects, but it has tremendous value in a school classroom because it can stay unfired. Paperclay is strong enough to be painted with acrylic paints and acrylic sealers once the student sculptures are dried. It will last as long as it stays protected from water. These sculptures, painted colorfully, provide opportunities to explore and integrate art with class subjects. Compared to artificial modeling clay materials, real pottery clay has endless learning opportunities for students of all age
Antoinette is available to assist schools to start their own clay program, regardless of access to a pottery kiln or not. Through arts integrated lessons Antoinette can help to bridge the visual arts with the all subject areas. let her know where your needs are and with your collaboration she will help you to develop an approach to teaching that will benefit your students. Also see the article about paperclay mixing
All images taken by Koos Badenhorst
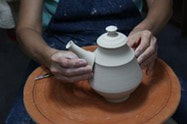
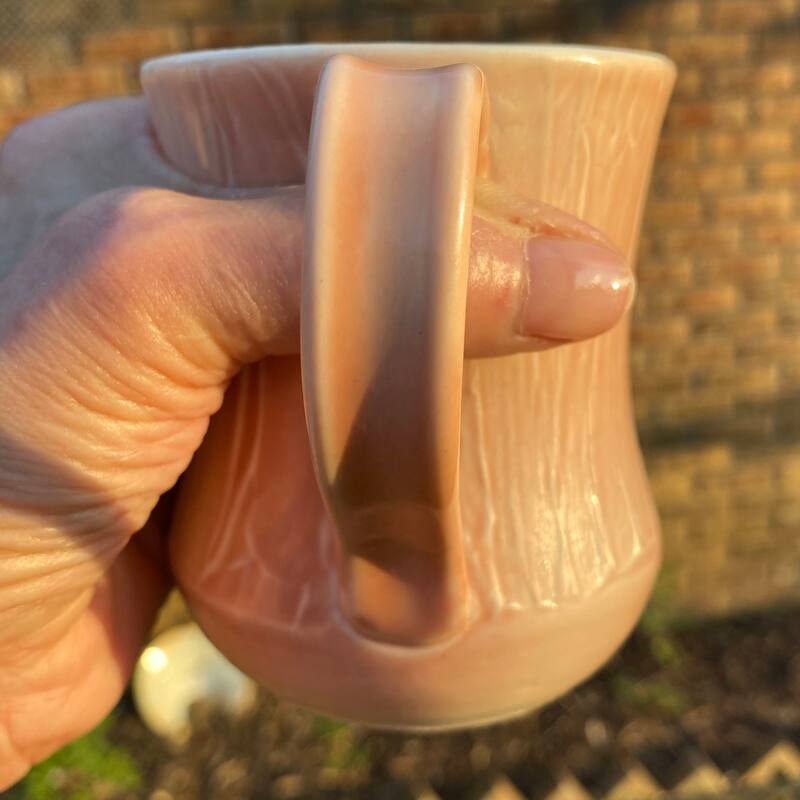
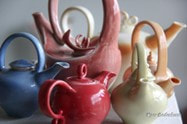
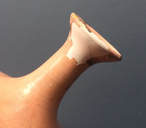
A handle situated correctly will make it easy to guide the body to direct the liquid to the spout. When the handle is tilted towards the spout, the liquid will flow easily, in an eloquent stream, or it will spatter and spit as it comes out, depending on how well the spout is formed. A well formed lid, will stay in place and not fall out if the teapot is tilted. If it must be held in place with the other hand it is not well formed. Consider an elderly, frail and weaker person pouring tea; they may need 2 hands just to hold the teapot. There must be a vent hole in the lid (some are in other places on the teapot), because steam builds up when filled with hot liquid and forces spattering at the gallery between the lid and body, if there is not a vent hole where the steam can escape. Then there is a foot rim which is finishing the form of your teapot. For a functional teapot this is a big consideration, because as the maker you do not know what kind of surface the teapot will stand on. A cold surface will cool the liquid down too quickly, whereas a wooden table may burn from the hot liquid. If the surface where the teapot will be used, is not perfectly smooth ( consider knotted wood or pebble stone tables) the foot must be as such that it will still keep the teapot balanced and up right.
Images taken during a teapot show at NCECA
Help me identify the makers of these teapots.
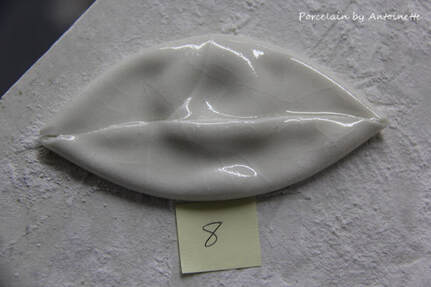
Small collectors teapots by AntoinetteBelow is a hand full of my own teapots that I made over the years. Most of them found homes. The small collectors teapots are on average the size of a small orange. Although they all function as teapots, it is considered to be ornaments, due to the size, but also the way handles, lids, knobs and in many cases the foot rim were created.
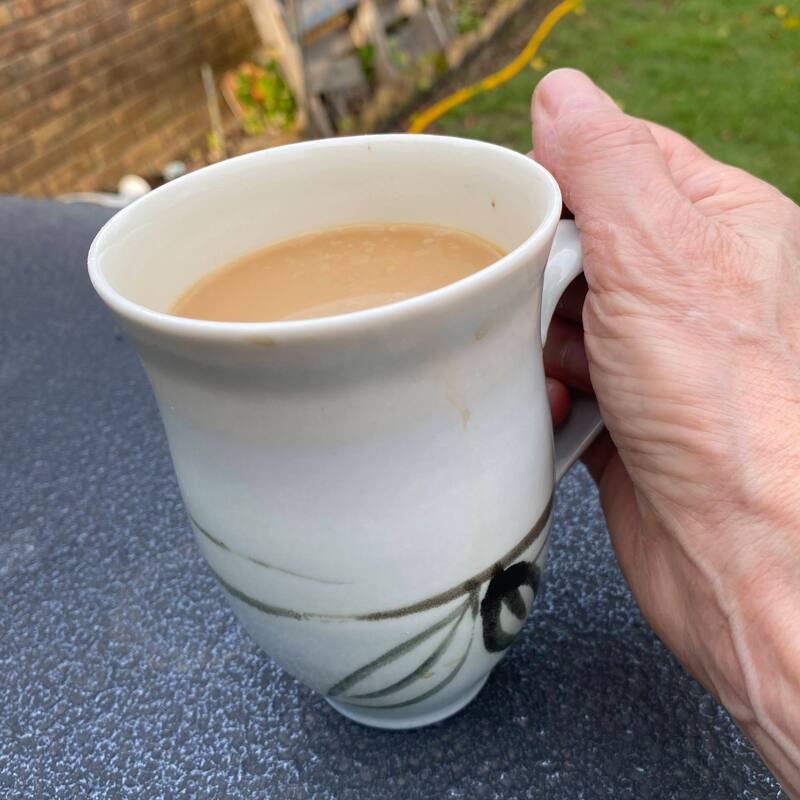
What does it mean when functional pottery is microwave or dishwasher-safe? This is a question often asked by my students, but also one that my art supporters should know the answer to. Potters want to know how they can make their pottery microwave or dishwasher-safe. Many of these questions are answered in one of my porcelain classes; either online or hands-on, so this is just a summary of what to know. There is a combination of ways to make functional cups, plates, and dishes safe to use and eat from. Everything boils down to a combination of the raw materials in your clay and glazes and the way your work is fired. Potters do not always understand that temperature is a small part of the whole firing process. They should know and understand their raw materials and understand the firing process is also about heat work among other things. Pottery that is not fired to vitrification, will be porous enough to allow water to seep into the fired clay, even when it does not look like it has water in the walls. Liquid in the clay walls: Clay is not totally vitrified - it seldom is; very well composed and fired porcelain has as much as .5 % porousness, which leaves the possibility for it to soak water up from food and in the dishwasher. When the clay and glaze do not fit each other well the clay did not shrink enough to fit the glaze, it will craze and leave open areas for water to seep into the still non-porous clay. **Note**The other way round is even more unsatisfactory. When the clay shrinks more than the glaze, the glaze will “shell away” , a glaze fault that is know as shiffering. Very sharp and thin glaze ( glass) shells away from the clay. If swallowed, this can be dangerous. When liquid seeps into the clay walls during normal usage, cleaning in the sink or dishwasher and the object is then used in the microwave, the liquid in the walls will heat up and the steam that results from that, burn the users' hand during removal from the microwave. Remember: Overheating of the food content from microwave conduction is possible. In such cases the user cannot blame the potter for the heat. Clay is a very good transmitter of heat and it will radiate into the clay walls. When food is too long in the microwave, the heat physically transmits into the clay walls, however this is not a pottery flaw. The way to know which is the culprit and which not, is by touching the handle of the object in the microwave. The handle of well fired porcelain will stay cool, while the content in the cup will be heated. If the handle is hot, the object is not microwave or dishwasher safe. Test a bowl without handles, by testing the heat of the food and compare it with the rim or foot of the pottery bowl. Unless the food is overheated, the rim and foot rim will be cool to the touch. A high iron or other metallic content in pottery can also cause pottery to become hot in the microwave. Therefor it is better to work with glazes that are less saturated with metals like copper, ( which can become poisonous when it leaks from the glaze) iron and manganese. Containers can cool too quickly. The contrary of having a fully vitrified functional pottery is that it may not retain the heat of its content as it cool down faster than a non vitrified object. The beauty is that you can reheat it and feel ensured that your cup does not soak up liquid and become dysfunctional. There is however a very good and important counter to prevent your food or tea to get cold too fast. The correct design of a functional mug, cup, plate or bowl object is important, especially porcelain. Wide open objects will allow the content to be exposed to cool air and it will naturally cool down faster. Bowls and cups without foot rims will be exposed to the cold table surface. Remember clay and especially porcelain, transmits heat. Therefore the obvious answer is to design cups and bowls and even plates that are more enclosed to help retain the heat. Foot rims will elevate the food content away from the cool table surface and keep it warmer longer. Homemakers often wants to reject foot rims, because it may collect water in the enclosed foot rim when washed upside down in the dishwasher, but even for that there is a solution: cut openings in the foot rim to ensure the water to flow out and not gather in the foot rim area. There are artists that create double walls and even lids for mugs. Personally I do not want to go that route, simply because I am pursuing an artist route with my work, however, it is a solution for those that would want to find a commercial niche. Personally, I like my functional ware to be translucent and light. Any time I have a heavy mug or bowl in my hand, I feel that I have to concentrate more not to drop it. There are more technical factors to consider, but for now I want for our consumers to make informed decisions when buying dinnerware or functional pottery and I want to prompt you to tell me what you think. Go to Dinnerware for more information about my functional porcelain.
 All artists are confronted one or other time with shipping of their work. Often they end up disappointed and discouraged. The success of any shipping of artwork, start with the artist self. Too often they will spend expensive materials and dedicated time to the art process, but ship the work off to its destination as an afterthought. Artists tend to work to the very last minute before the work must be shipped. Trying to save money and time to ship the work as well as last minute neglect is just what is needed to waste weeks and months of hard work. To pack and ship safely and at the best possible pricing is just as much an art as it is to do the work itself. The only difference is that art comes from the heart and mind, whereas savvy packing and shipping comes from knowledge. The right packing materials for shipping artworkPacking materials are expensive and when I started to collect my old packing materials, Koos was not too happy with me. After all it takes up storing space, but the first time that I sent him to the store to buy a container with Styrofoam peanuts, his complaints stopped. Does that mean that one must keep old packing materials unconditionally? The answer is no. Packing materials wear out. After a few uses, bubble wrap will not be bubbles anymore and will become useless, especially when you are shipping heavier work, or work that have spouts and handles. Good sturdy packing materials is a must, otherwise you stand a chance to get your work broken. The human factor must always be kept in mind. There are people that may handle packages that does not understand the contents thereof. Accidents and possibilities that package will be dropped, thrown, hit or otherwise mishandled by any shipper must be expected. 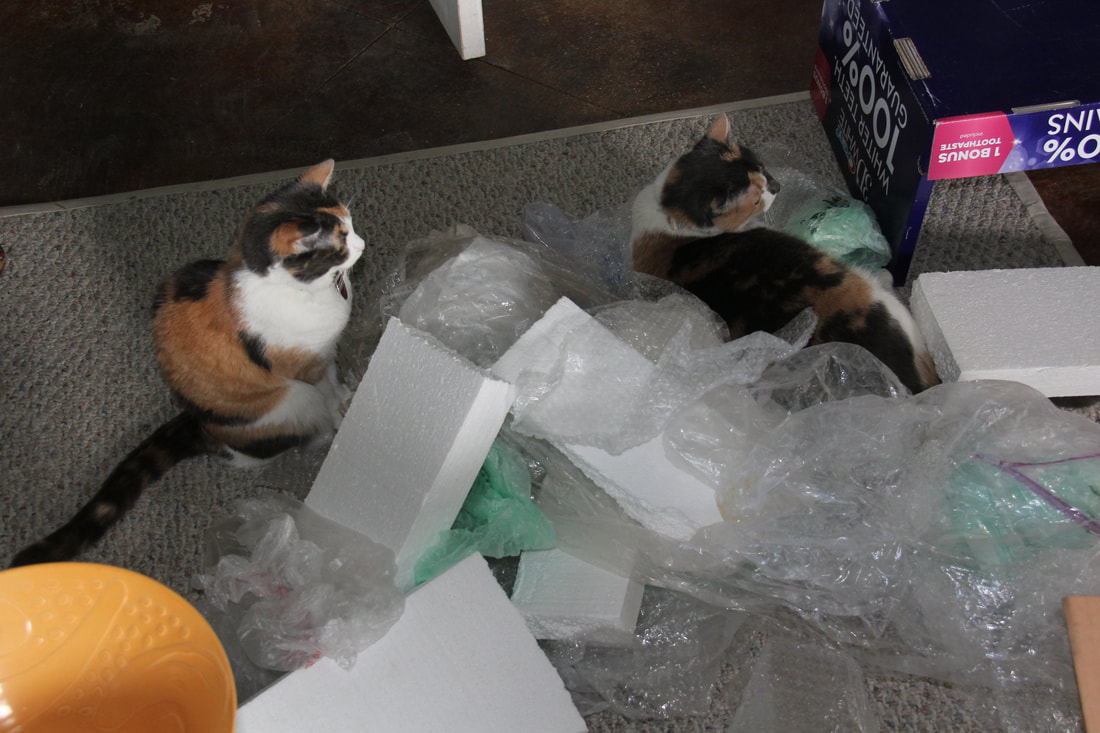 Saved up packing materials ( a cats heaven!) Use the right box |


 RSS Feed
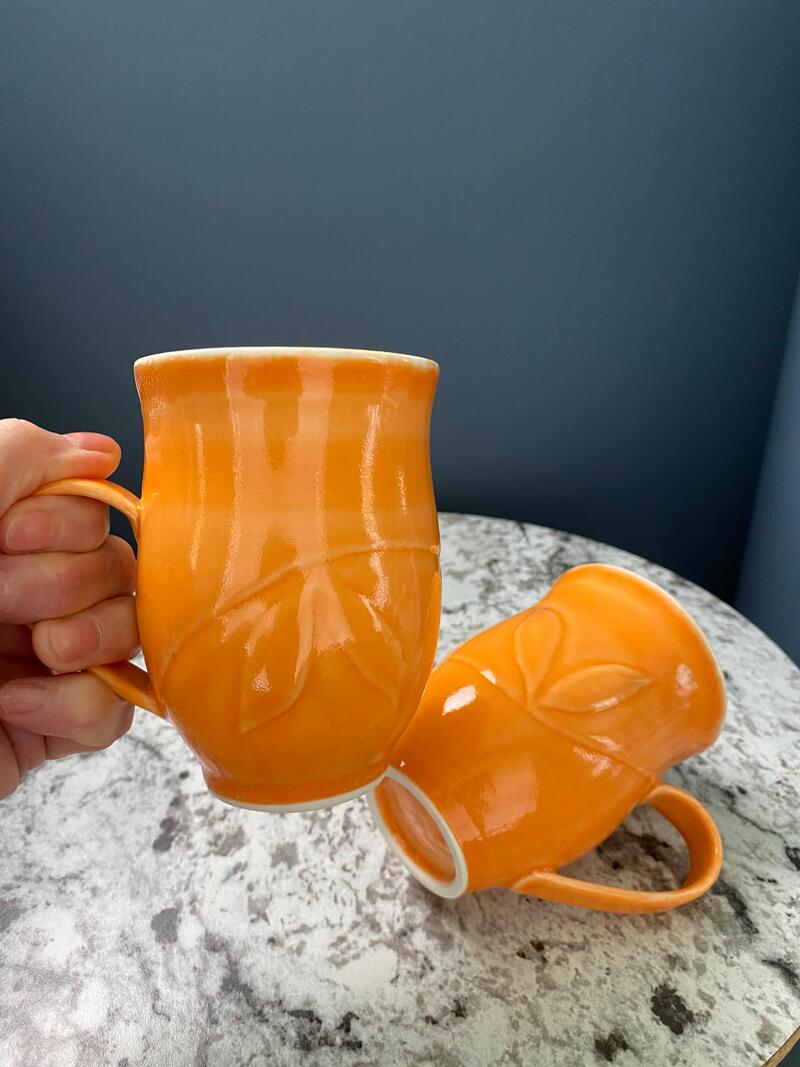
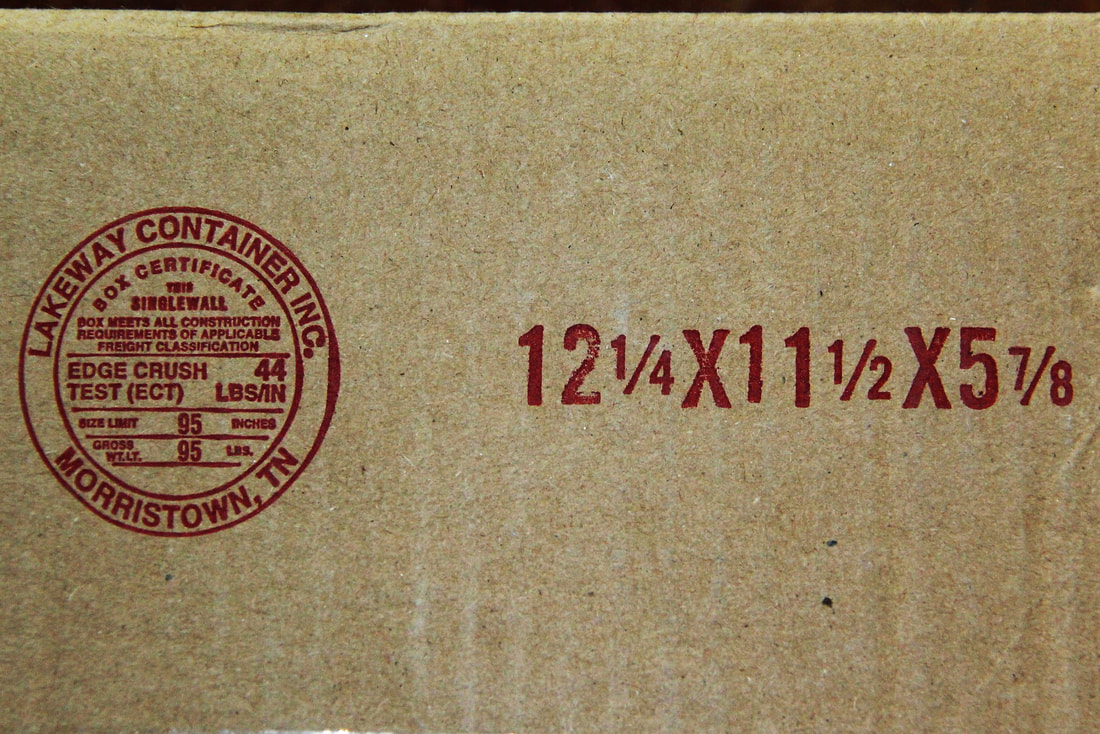
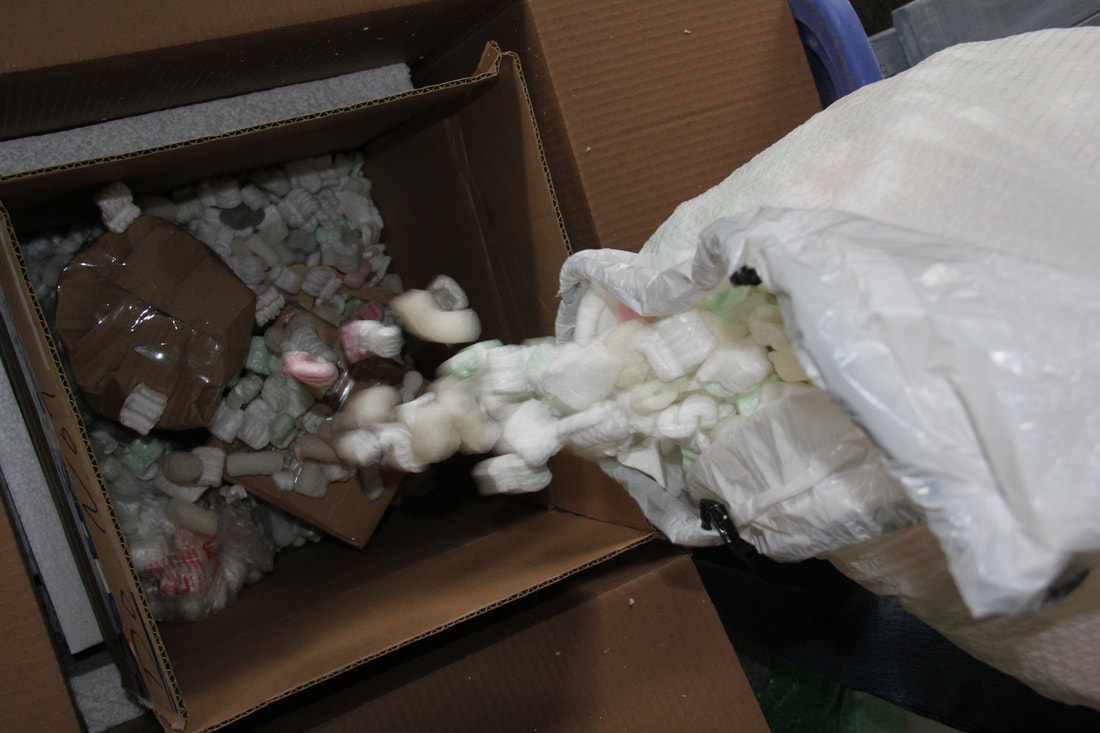
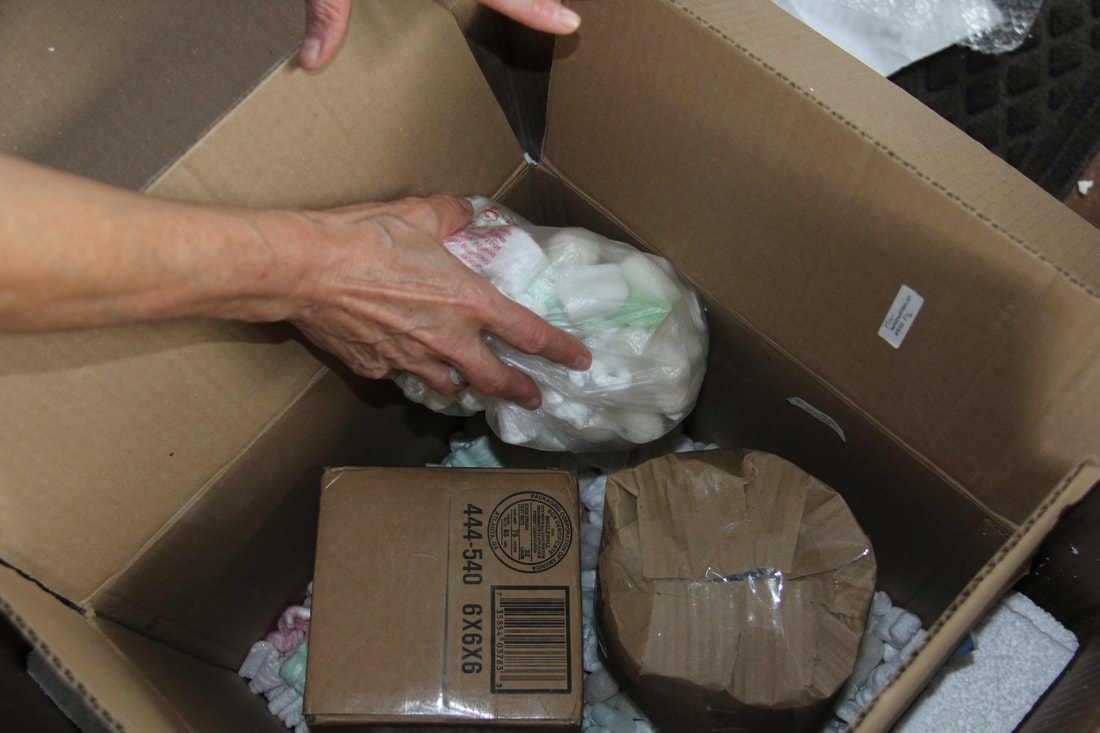
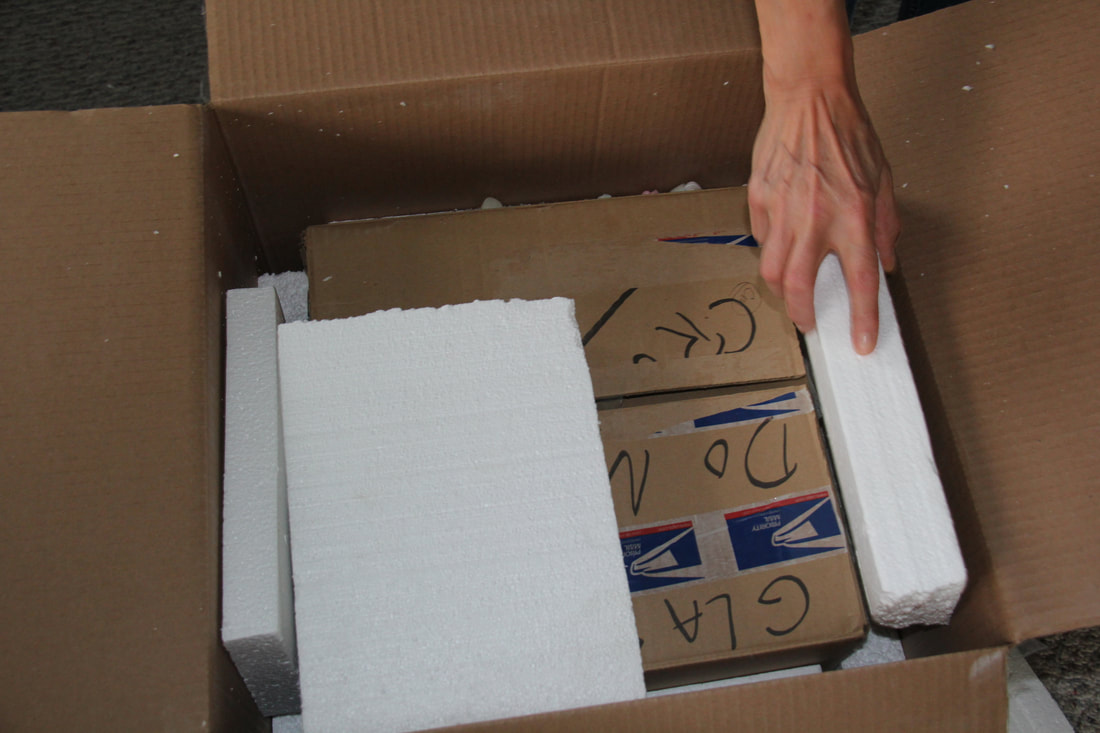
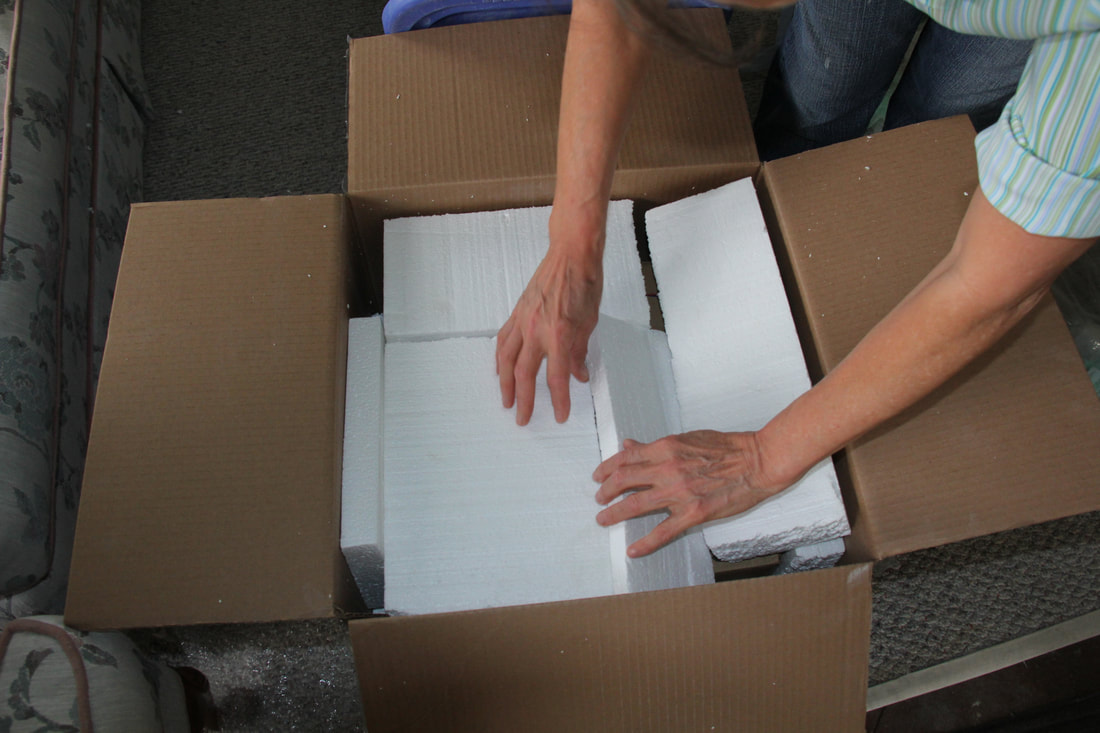
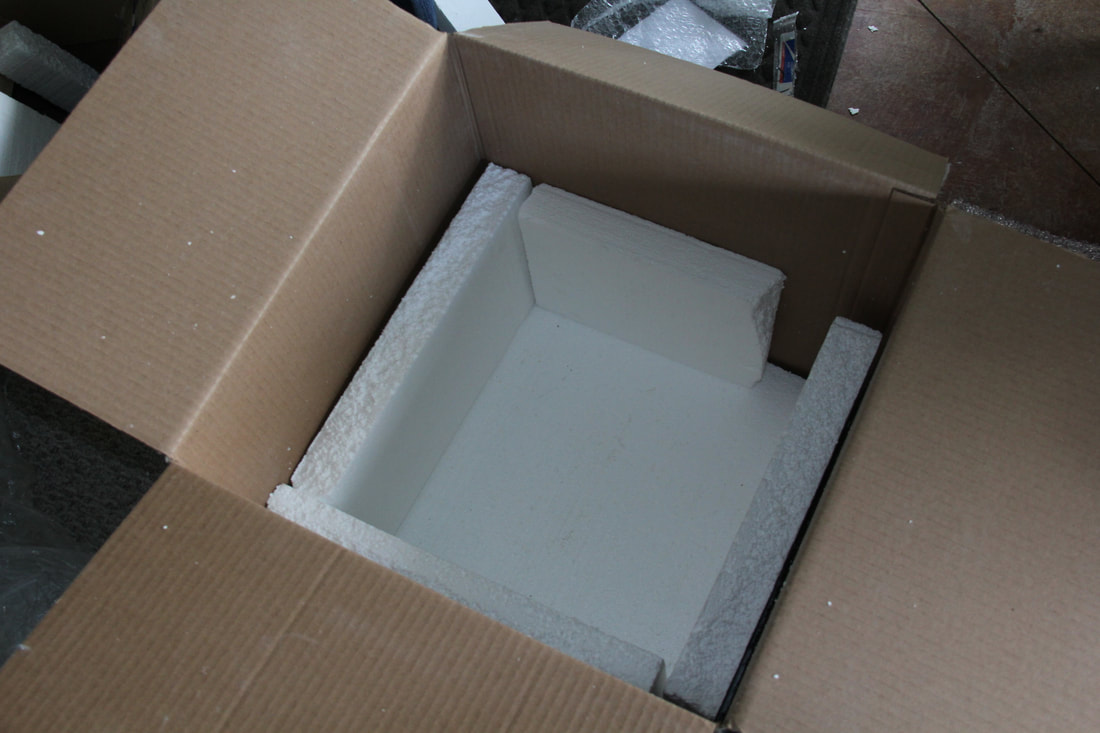 Strengthen the box with Styrofoam sheets | People often ask me how do I ship my fine translucent porcelain to galleries and clients without damage in transit. Well, I had my fair share of broken pieces in my lifetime of creating pottery, so I would like to share some of the things that I have learned over the years with you. I use the double boxing method. Start by lining a sturdy box with Styrofoam sheets. An alternative is regular upholstery foam or Styrofoam peanuts. When the option of peanuts is used, line the bottom of the box, place the second box in place and fill the voids up with Styrofoam peanuts. |
I use the double boxing method.
Start by lining a sturdy box with Styrofoam sheets.
An alternative is regular upholstery foam or Styrofoam peanuts. When the option of peanuts is used, line the bottom of the box, place the second box in place and fill the voids up with Styrofoam peanuts.
Start by lining a sturdy box with Styrofoam sheets.
An alternative is regular upholstery foam or Styrofoam peanuts. When the option of peanuts is used, line the bottom of the box, place the second box in place and fill the voids up with Styrofoam peanuts.
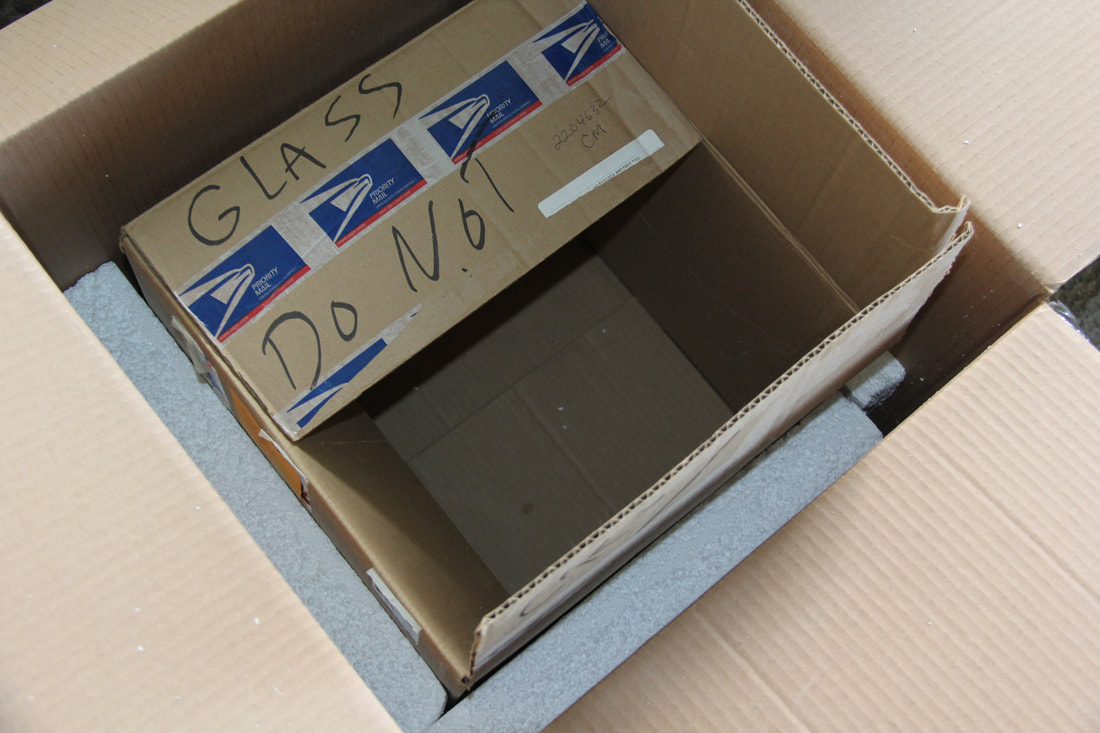 Double boxing is the standard to ship artwork.
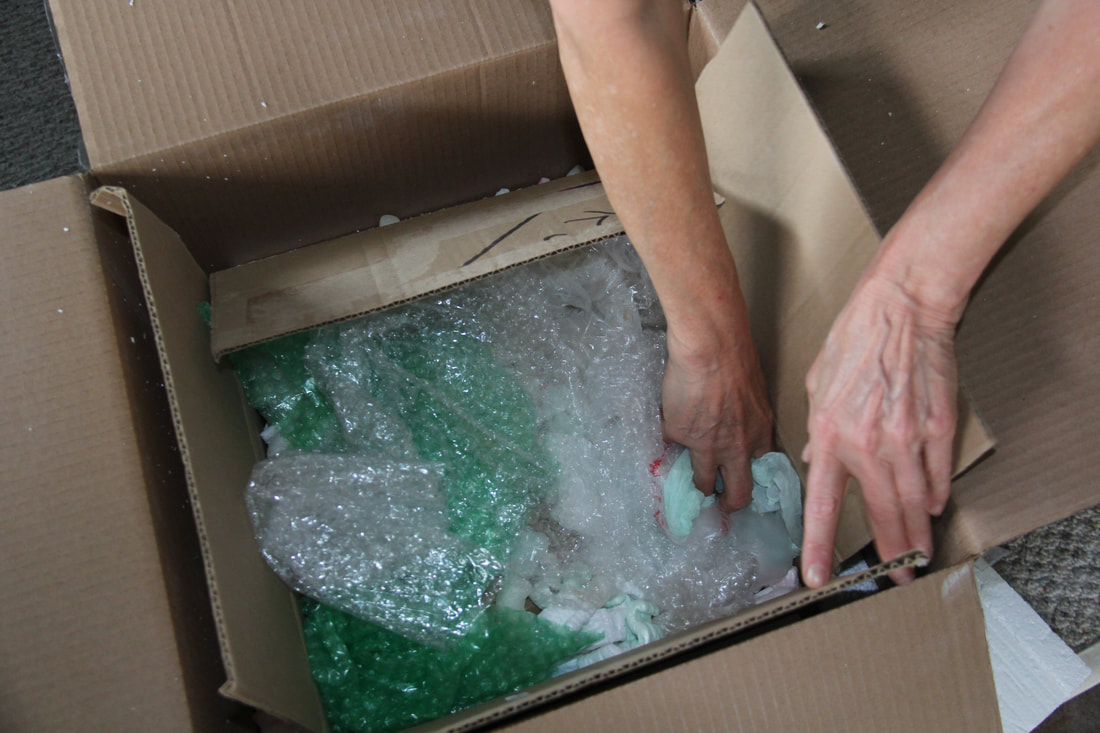
Some areas on my bowls needs special attention. Outstanding edges and foot rims may need extra protection. For those areas I create a cushion with anything soft available.
 Available in the shop. Click on the image to see it there. | 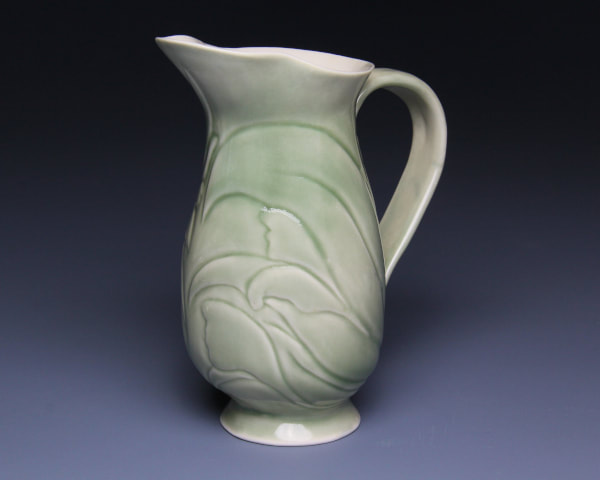 Protect the edges. |
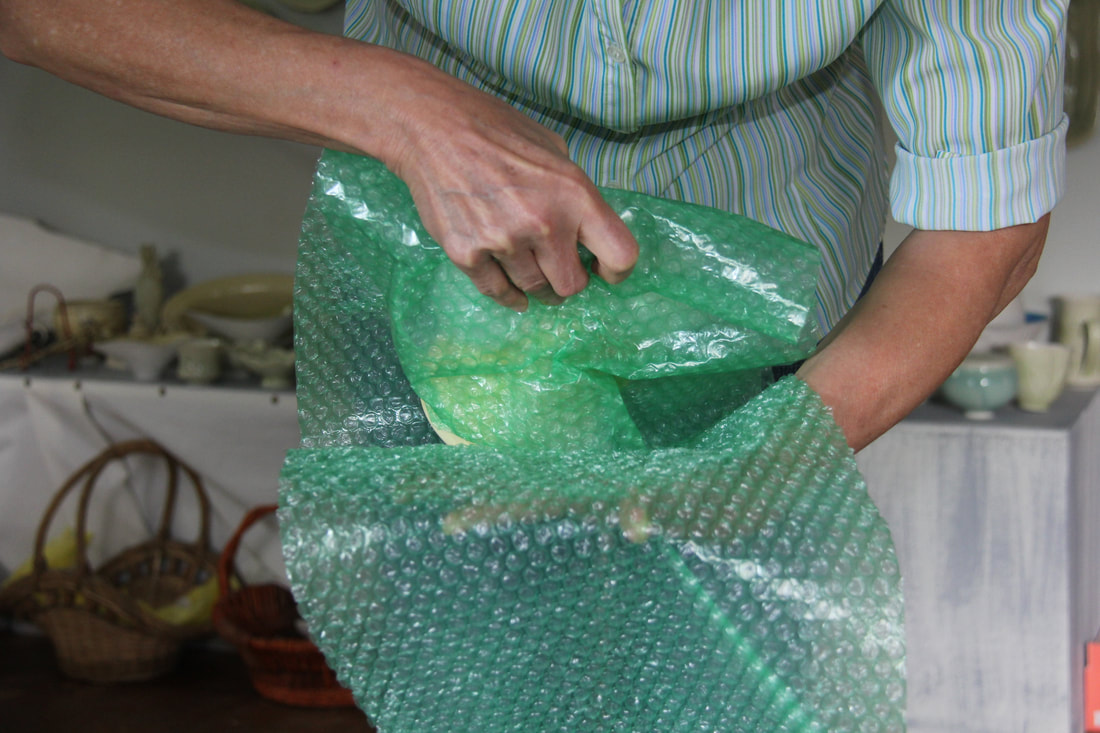
Create the cushion by either double or triple the bubble wrap in that specific area. Upholstery foam can also be useful for special protection. Start by wrapping each item separately in bubble wrap. The thicker the better, but at least with a double layer of standard bubbles.
Wrap spouts and handles separately by creating a cushion.
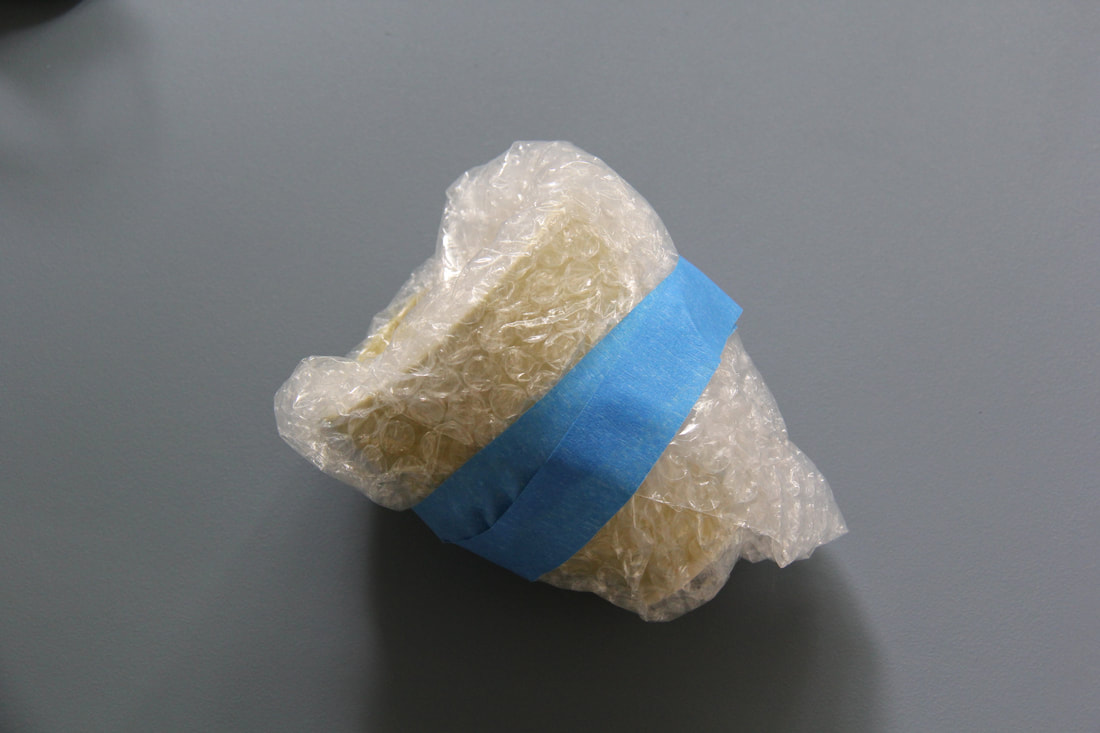
Lids can be packed separately, but from personal experience I like to keep them in place and secure them with bubble wrap and tape on the teapot.
Wrap spouts and handles separately by creating a cushion.
Lids can be packed separately, but from personal experience I like to keep them in place and secure them with bubble wrap and tape on the teapot.
 | 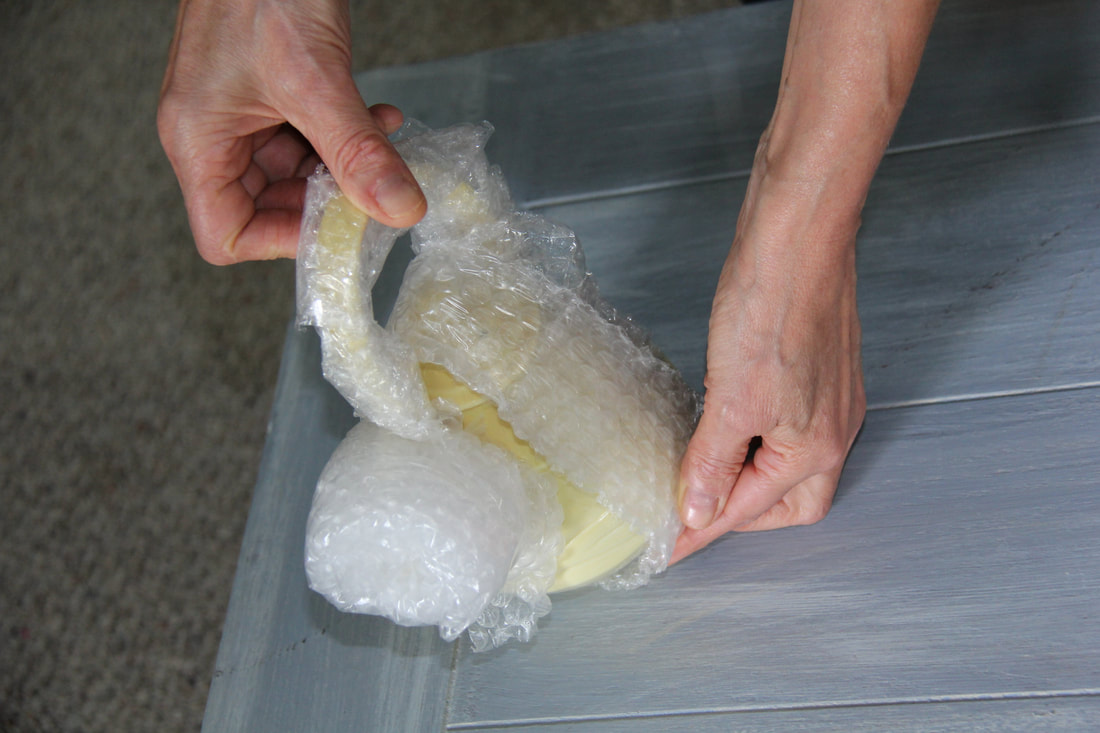 | 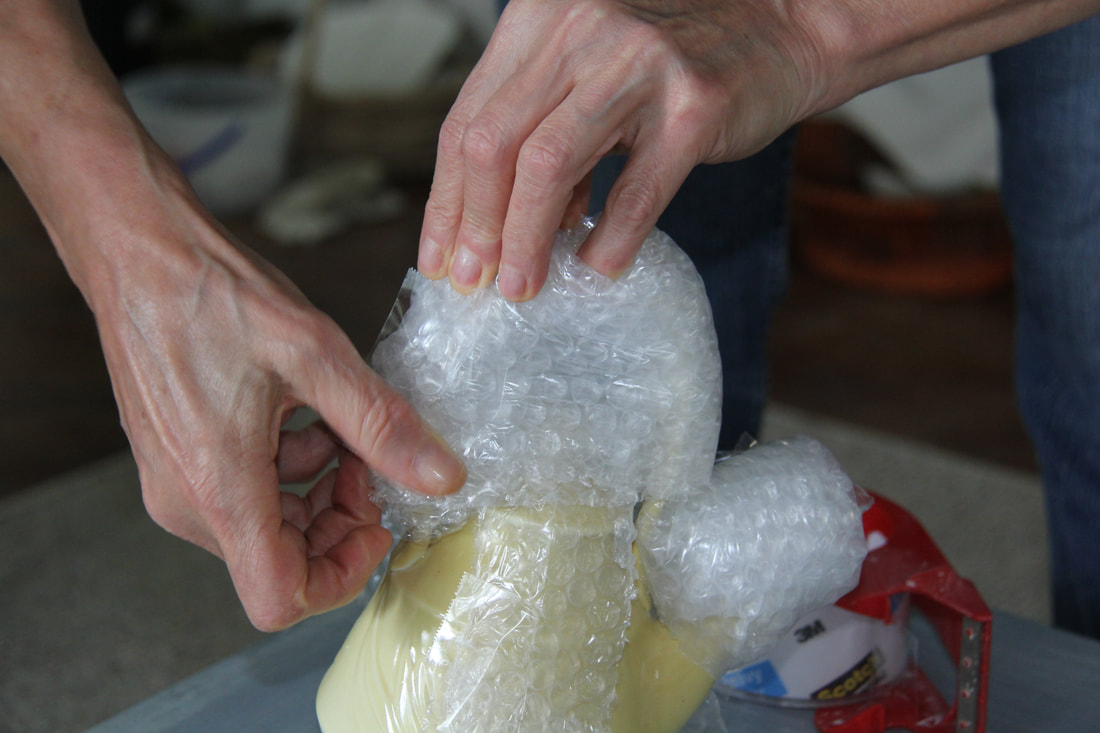 |
Once every outstanding parts on the pot is secure, I cover it with a single piece of bubble wrap.
 | 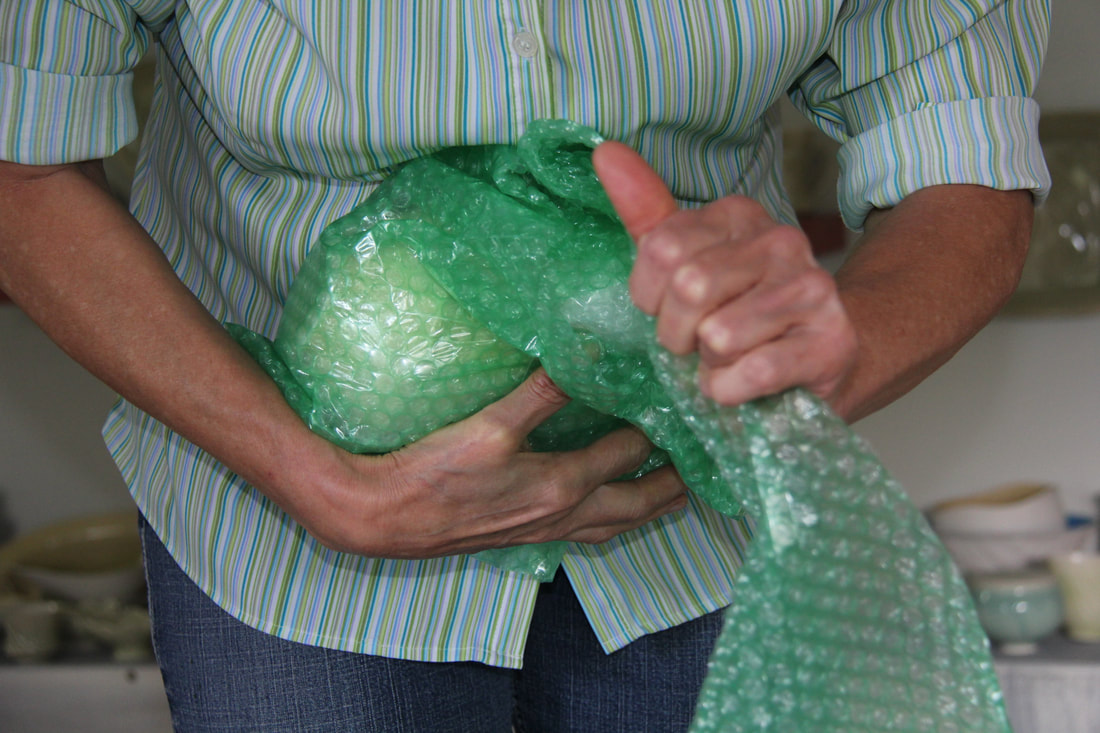 |  |
Use a light tacky tape to hold the wrap together. You can also use clingwrap. In that way it is easier to open and safe the bubble wrap for either return packaging or for re-use later.
Use a light tacky tape to hold the wrap together. You can also use clingwrap. In that way it is easier to open and safe the bubble wrap for either return packaging or for re-use later.
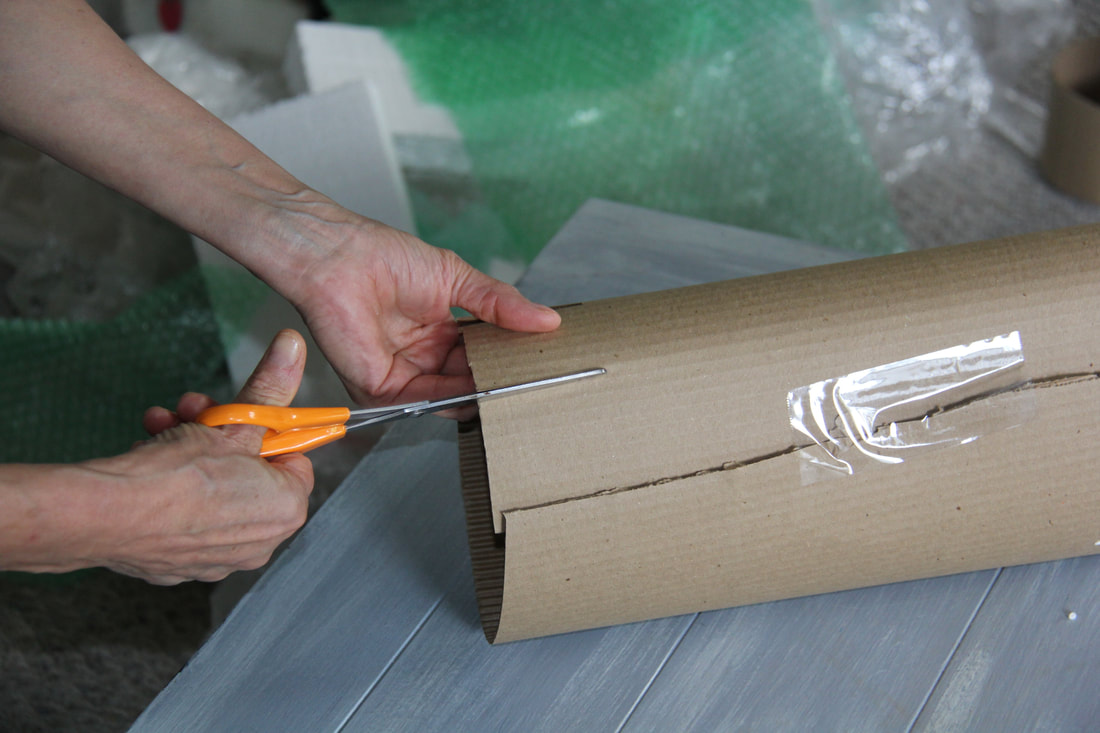
The use of corrugated carton paper
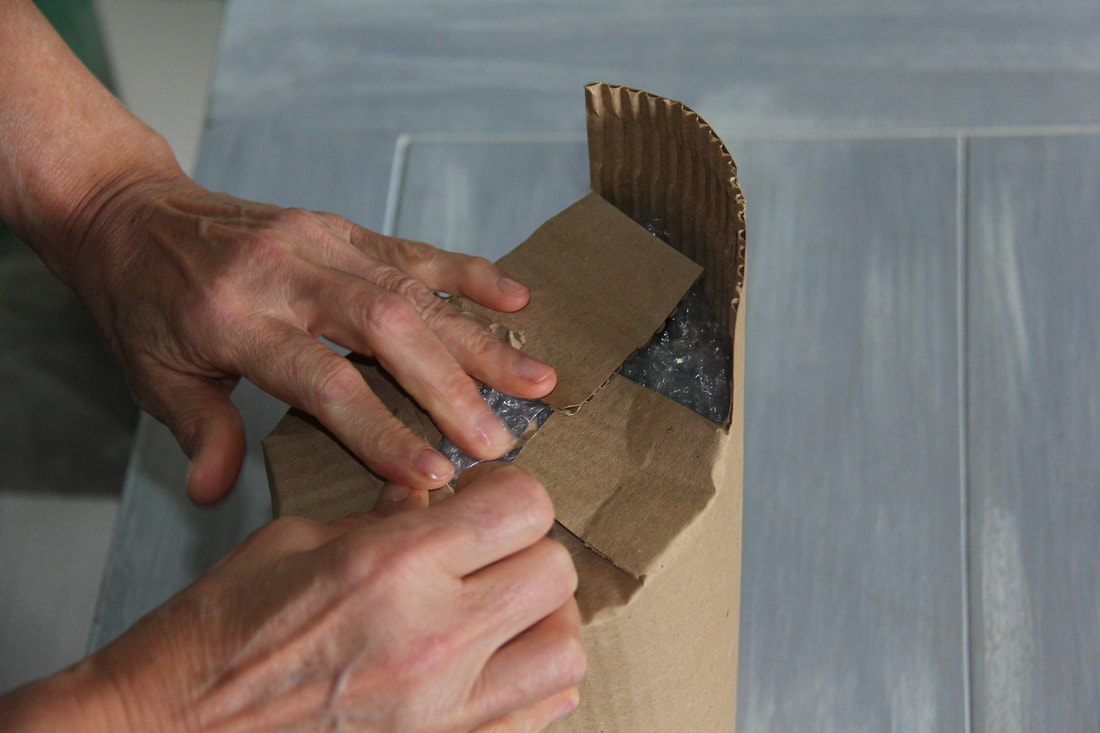
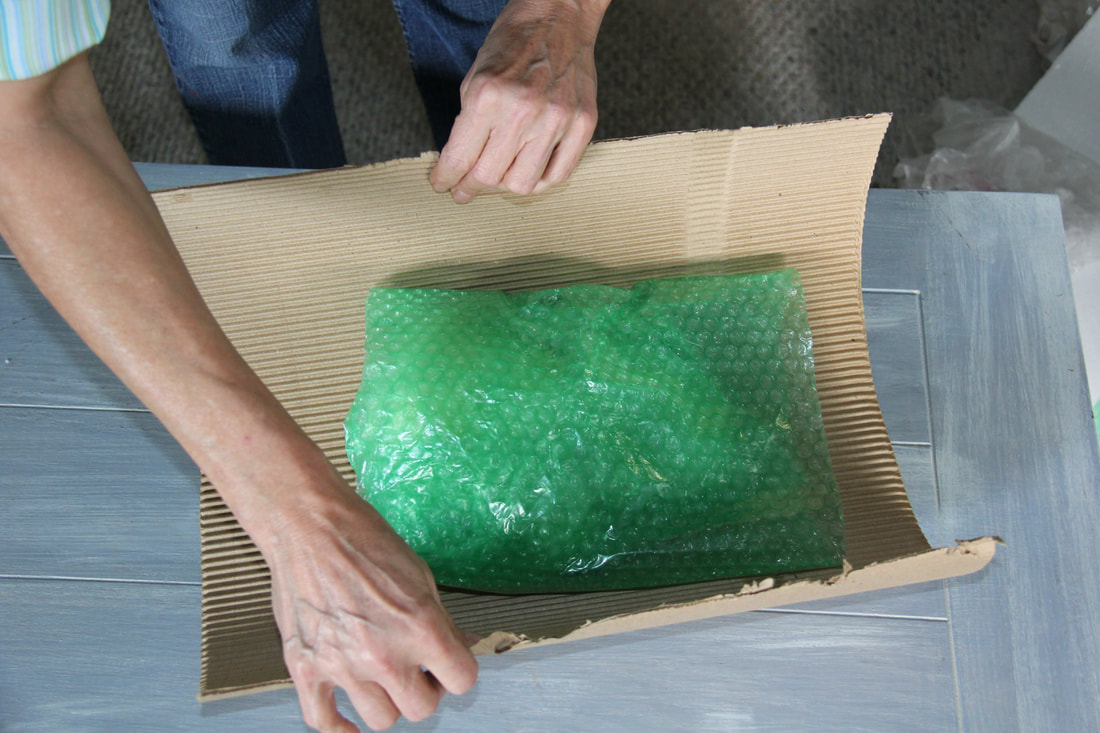 Corrugated carton keep the work sturdy. | This is how I use corrugated paper rolls to create a "box" One of my biggest frustrations in the past was boxes that are either too big or too small. Too small may let your work bulge out of boxes. Too big waste valuable space and money. So when I discovered corrugated wrap roles, I was very happy. That means I can custom box wrap each piece by itself and then place it inside a larger box. Wrap a big enough sheet around the padded object to form a sleeve around the pot. Cut slits in the bottom part of the paper. |
Fit the carton around the work.
Fold it in to form a sturdy platform for the pot to rest on.
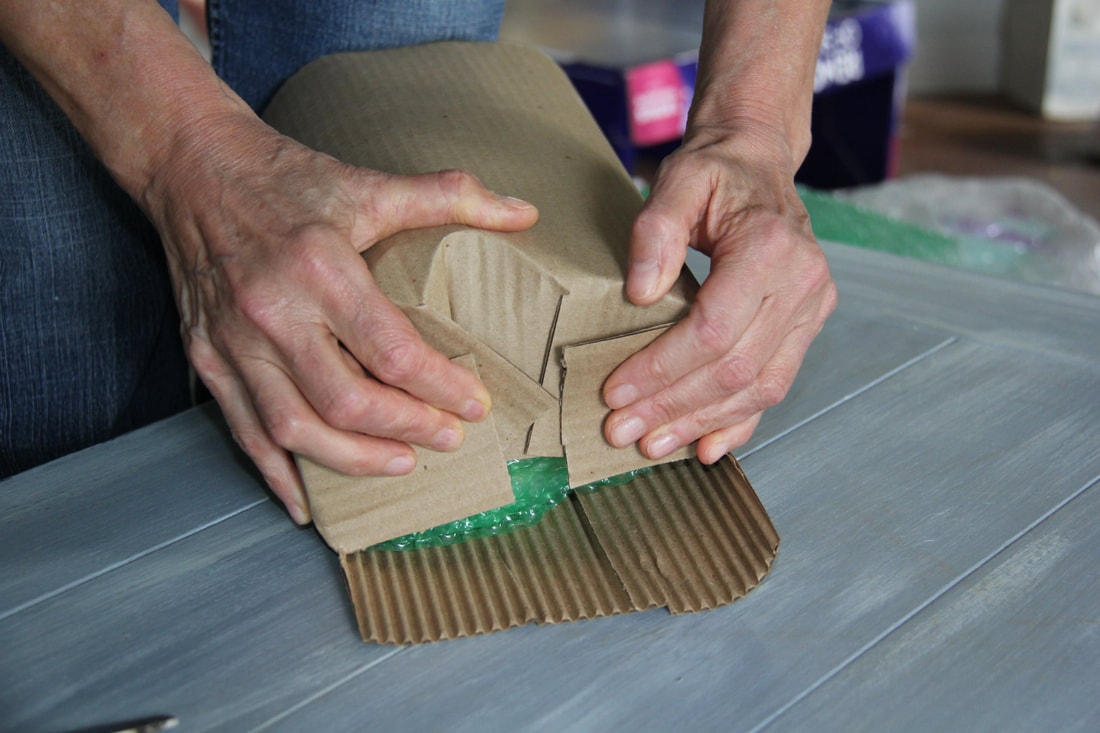
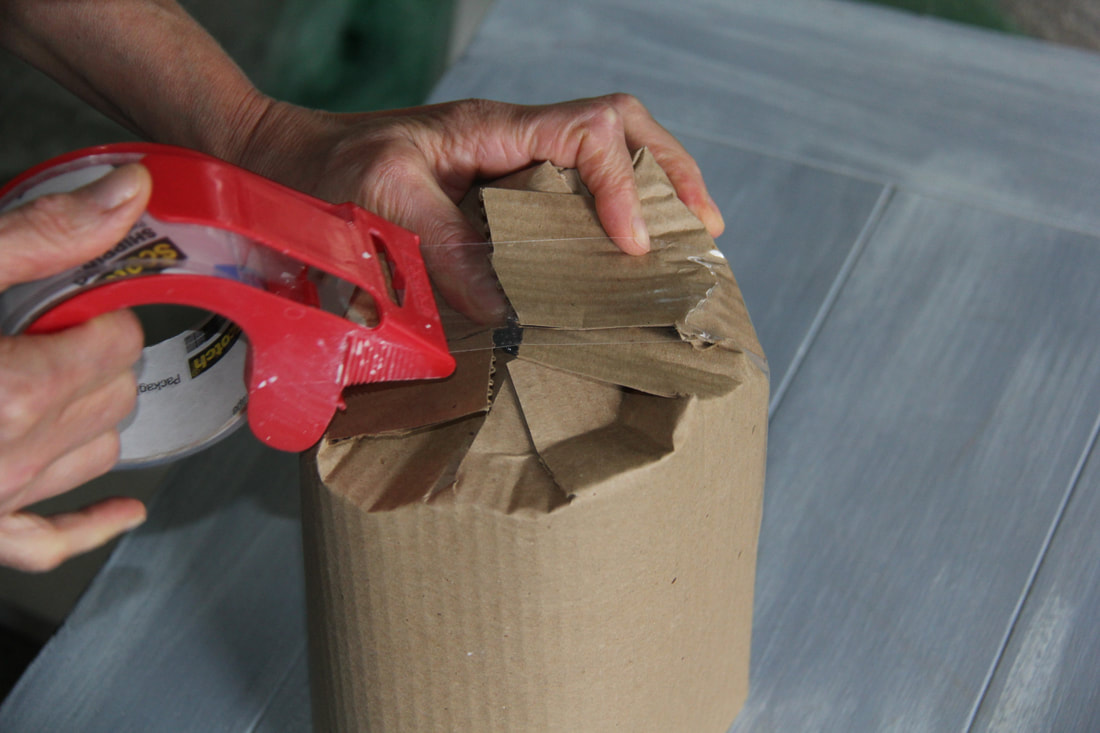
Secure artwork from all sides.
Tape it together with 2 or 3 strips of tape so that it secure the platform from all sides
Clear buff tape holds it together.
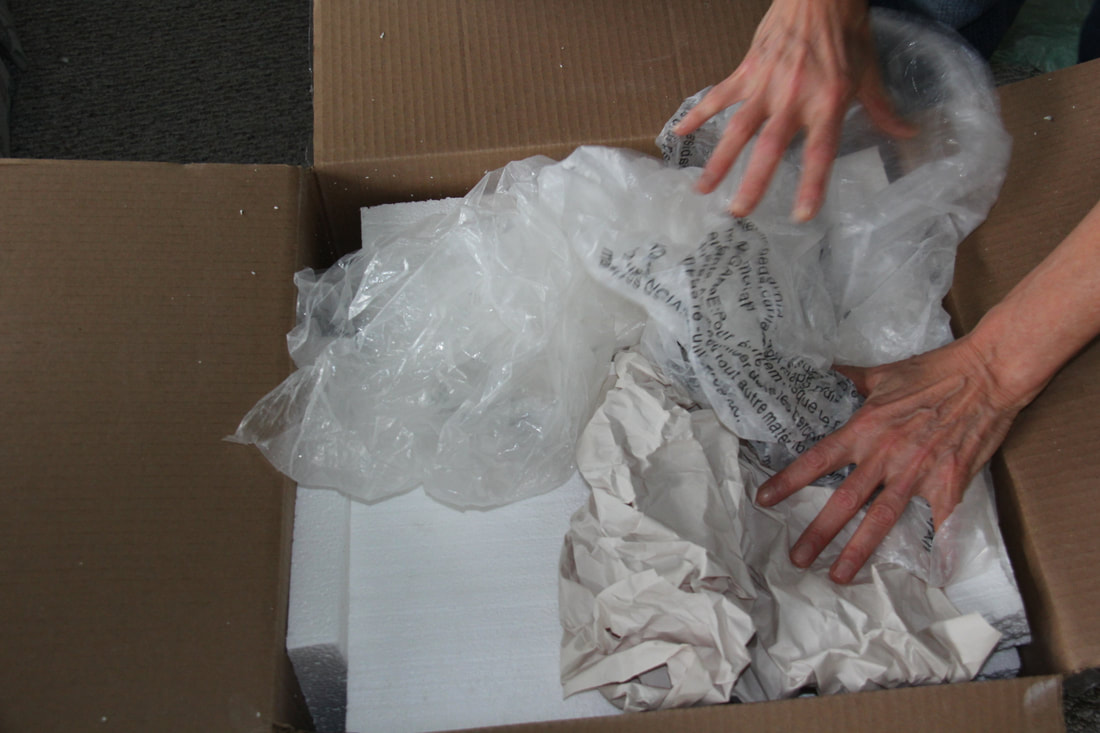
Most of the time there will be open areas in and around the object that needs to be secured. Anything from soft plastic or paper to foam and bubble wrap and Styrofoam peanuts can be used to fill these voids
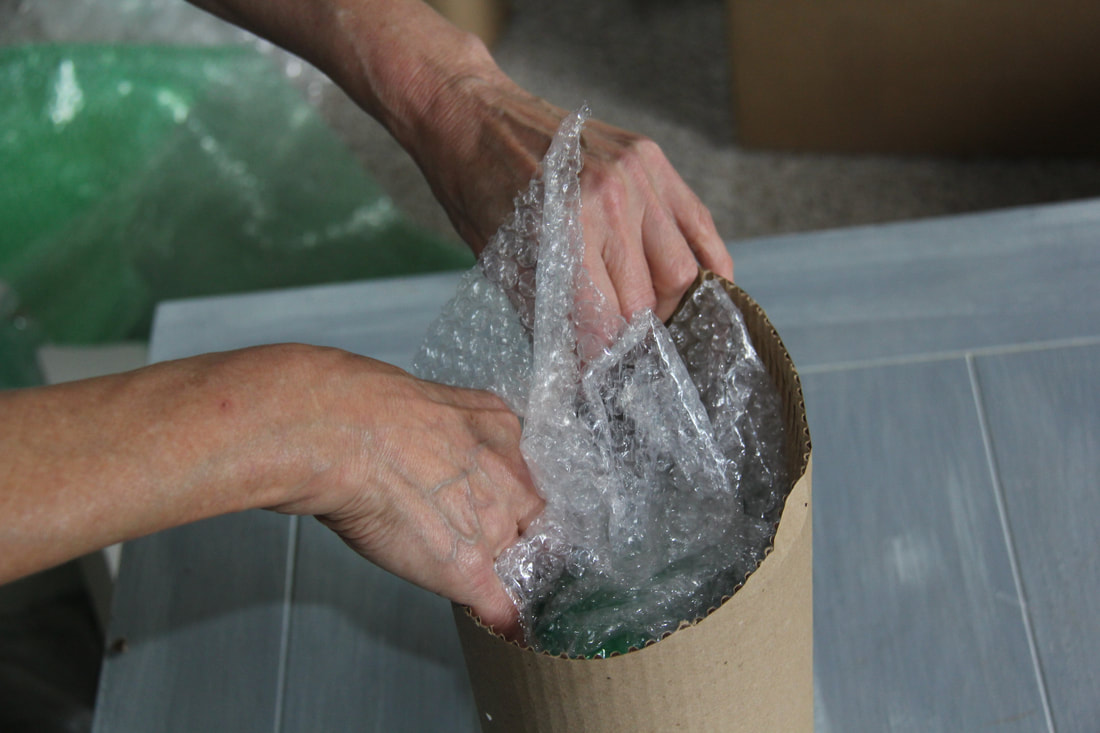
Make sure the artwork is tightly packed.
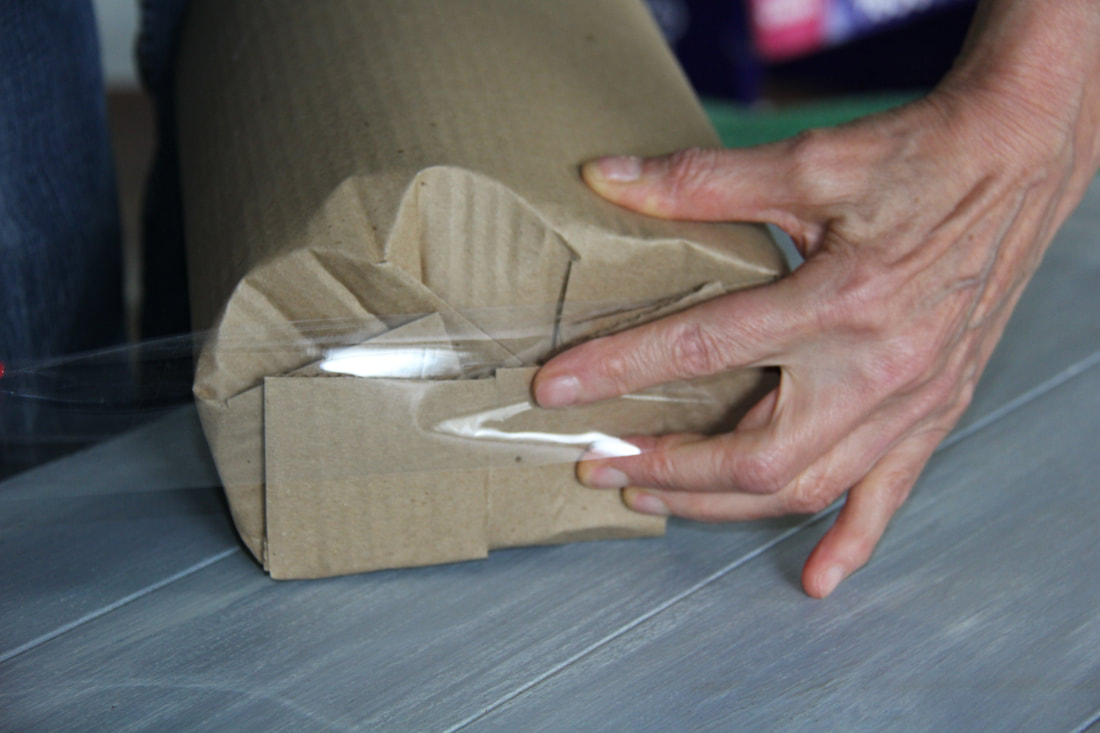
Cut slits on the other side of the paper sleeve and fold it in.
Secure the whole package with tape.
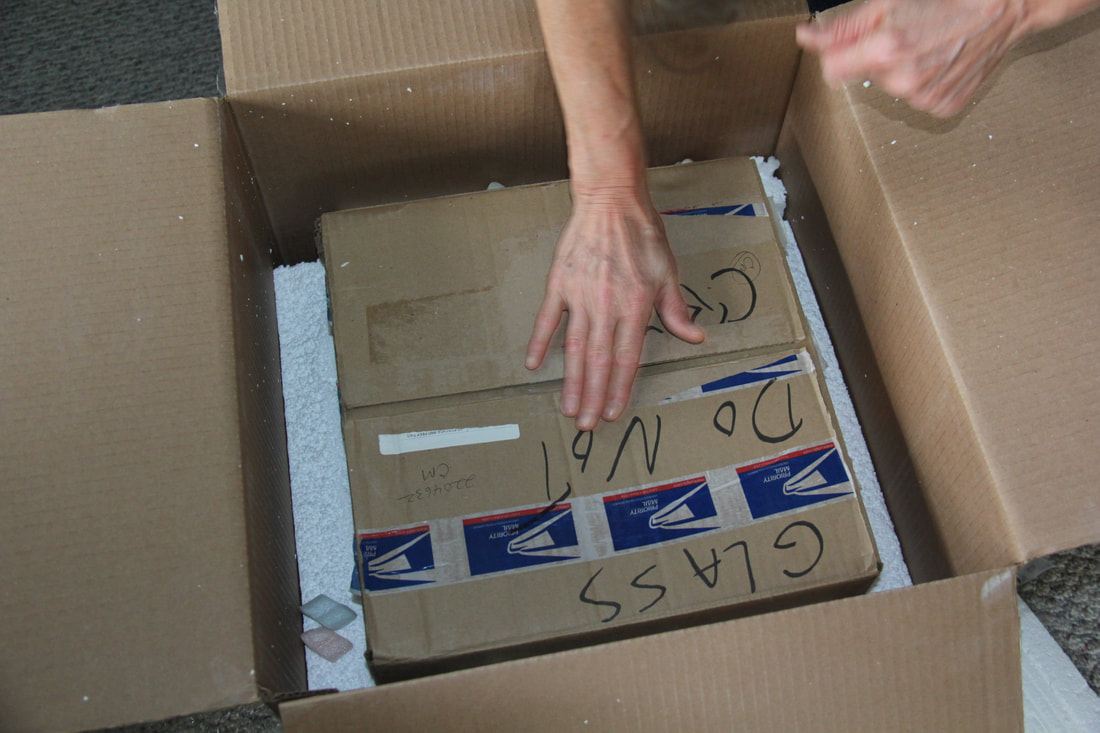
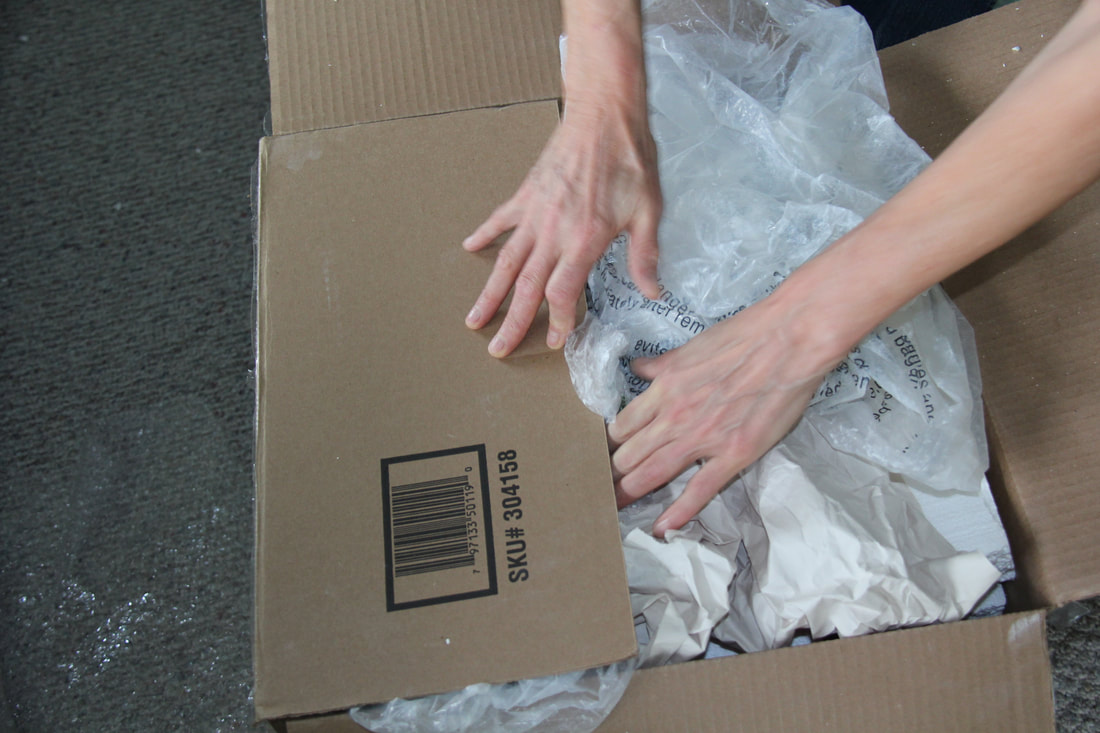
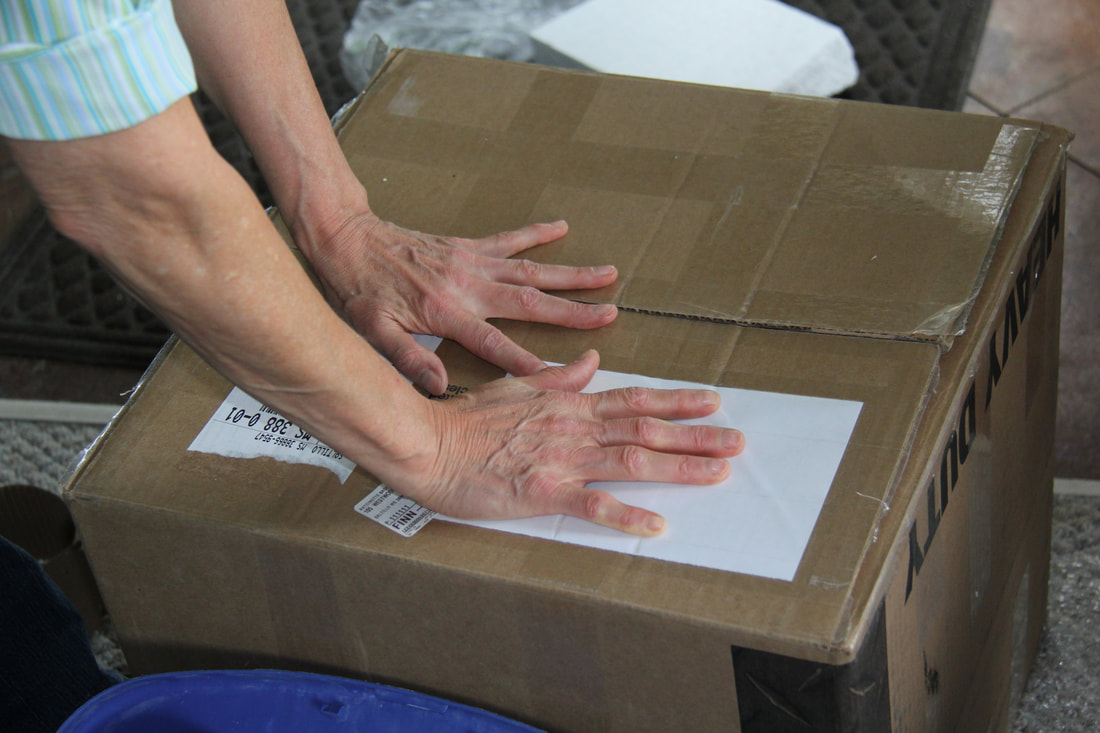
It is useful for the sender as well as the receiver of the pottery when every piece is marked with at least a name, but even better when a reference number from the invoice is provided.
In that way, the sender can double check if everything that is on the invoice is ready to be packed.
The receiver can double check what is received, but in case of work that must later be returned after an exhibition, the same packaging material can be used again, making it easier to pack the piece in a custom made packaging, and also to check if everything that was sent out, is received back in good condition.
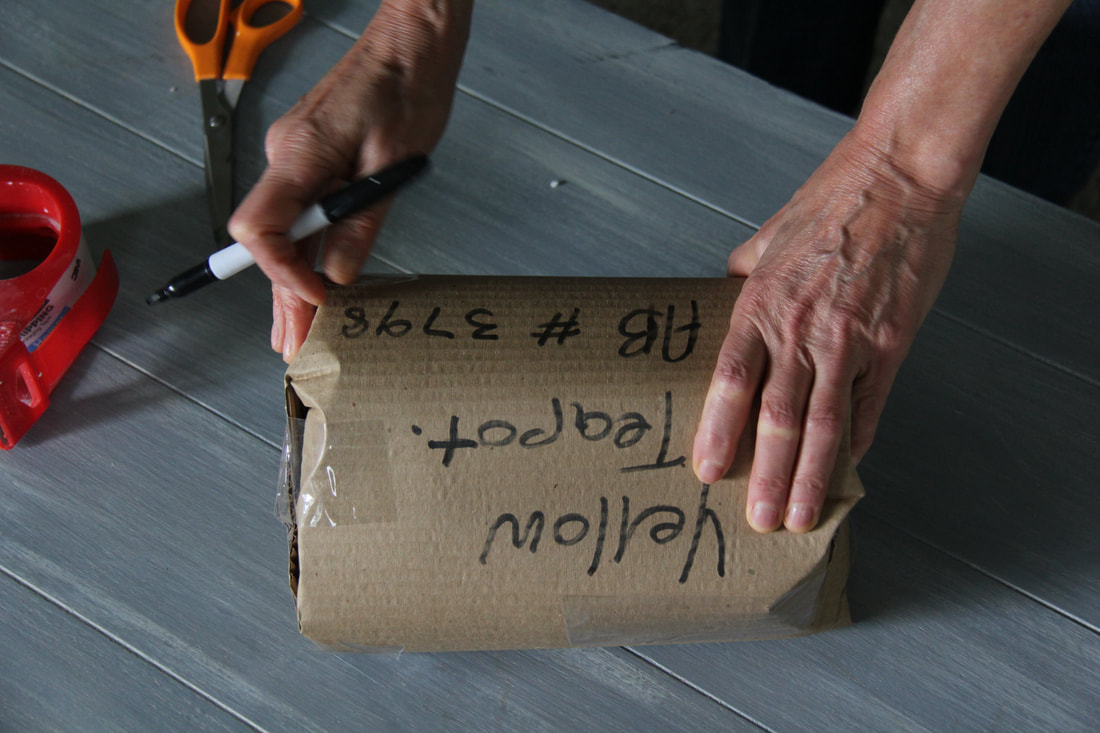
Mark the carton with an invoice number and if needed tape an image around the sleeve to tell exactly what is included.
The harder shell from corrugated box paper, or small boxes around each piece keeps it separate and secure from each other. Pack the enclosed objects inside the double box.
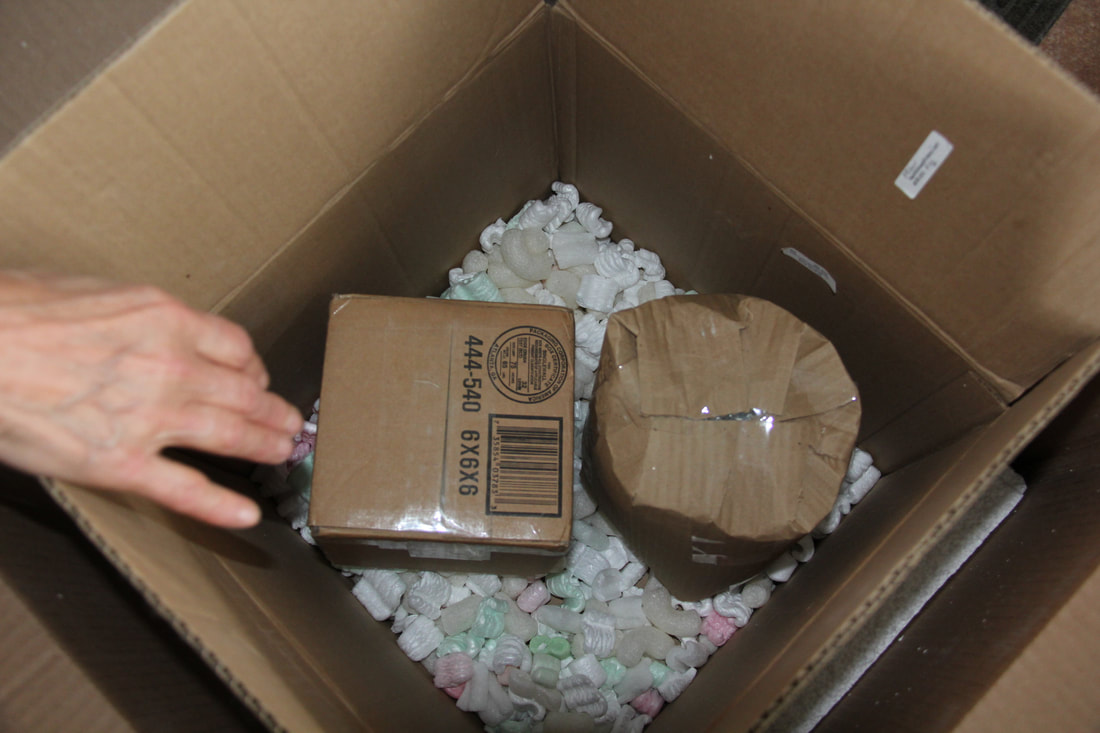
Use peanuts, confined in a bag, or air pillows.
Most galleries and shops do not have a big place to unwrap packages. Styrofoam peanuts flying around in the destination of your package can be seen as inconsiderate.
Plastic bags filled with Styrofoam peanuts will help to prevent it from flying around in a gallery.
Plastic bags filled with Styrofoam peanuts will help to prevent it from flying around in a gallery.
 |  |
Add any soft plastic or other materials already mentioned to level the content in the box. Air pillows is also useful.
Air pillows will be very effective.
Once the interior box is full, secure the lid tight.
Styrofoam sheets and any other paper or plastic or bubble plastic can be used to secure the upper side of the box. Do not allow any room for objects shifting around inside the box. After an invoice sheet is added to the box, it is ready to be taped. When the box is filled, the lid must appear level, sturdy and tight.
 |  |  |  |  |
Tape and secure the box to make it ready for shipping.
It is useful to inform the galleries of the way that you pack your boxes. Most galleries that either work on consignment or that present an exhibition would keep the packing materials for re-use. They train their staff to pack and unpack artwork and it is helpful for them to understand the process that you are using.
I will appreciate it if you share your expertise with packing of valuable objects with me. There are many other types of art work that must be shipped. There are sculptures and other valuables, much heavier objects that must be shipped.
I know that crating artwork and furniture is a complete different topic to cover. Maybe a guest blogger would like to chime in.
Links: Available artwork
Some time back, an incident took place in Miami Florida in which, according to the news, a local artist, Maximo Caminero, broke an Ai Weiwei vase worth 1 million dollars, in protest against the Perez Art Museum Miami (PAMM) that decided only to display international artists.
This was done against the backdrop of Weiwei dropping a Han Dynasty Urn in 1995.
This was done against the backdrop of Weiwei dropping a Han Dynasty Urn in 1995.
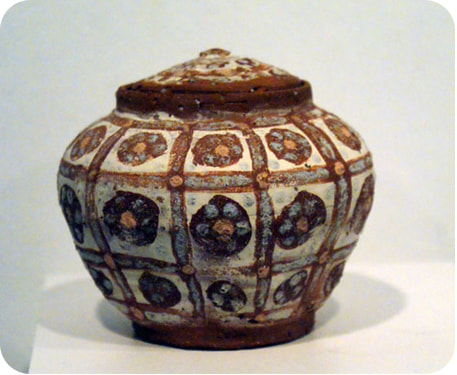
Is this a true example of a Han Dynasty (206 B.C. -220 A.D vase?)
A Beijing Chinese born, contemporary artist and political activist Weiwei has made a name for himself by creating thought-provoking art. His subject matter; the Chinese government and their stance on democracy and human rights.
In 2014 Weiwei displayed colorful vases in the Perez Museum of Art, Miami. According to news articles Weiwei described it as vases originally made during China's Han dynasty, which he then, took the liberty to paint.
The story hit the the spotlight when a video of the artist Maximo Caminero, deliberately dropping one of the Weiwei vases, were released. The pots were on loan to the museum from the artist, Weiwei. Caminero broke the piece in protest of the many artists that never get opportunities to show their work locally.
This incident is thought provoking. I see several things to debate about; maybe in different blogposts
Let me first discuss the actions of Weiwei:
I personally question the validity of the origin of the vases. First the Han Dynasty Urn that he broke in 1995 and then, according to news reports, painted 12 + antique vases colorful, is a destructing act in itself. How did Weiwei come by such works? There were 15 vases on display. Coming from China, one can argue that true antique vases may be easy to come by there, but knowing its value, would or should it not be protected artifacts?
In the bigger scheme of things whether the vases were authentic of fake does not really matter, but the idea of destroying any art to protest an ideology, in itself is disturbing to me.
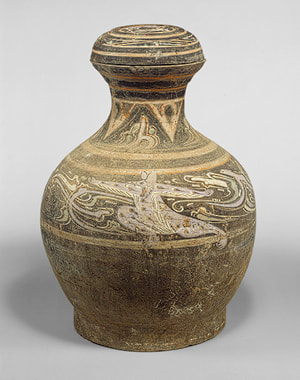
Is this a true Han Dynasty Urn?
Let’s suppose that it is true Han Dynasty vases.
As I said earlier, I believe that if those were original vases, then every brushstroke is an act of destruction in itself.
In truth Ai Weiwei do not protest against the Chinese government, but he protest the hard labor of those potters long past. He serves only himself, getting attention, which he do not really need. My theory is confirmed when he mentioned to the news medias that he did not get much attention from the urn-dropping incident. Why is that? Or is his statement just another attention grabber?
These treasures are the true culture on which China was founded, BC. Destroying some of the inheritance of the people may not be felt physically; that is if there is plenty available, but it is definitely morally wrong.
Whether the vase that Weiwei broke in 1995 was fake or not, the example that he sets is very unwise. Who are we as artists to think that we can make and break the world like he believes he can do? Will that not make us just like those that destroy art museums and churches and monuments in the name of war?
Pete Pinnell, righteously said on Facebook that when a work of art has survived 2000 years, no person can claim it, but only possess it. If those vases that Weiwei painted were true Han Dynasty vases, Weiwei should have been responsible enough to have them in a safe place for generations to come and not painted them for his own attention.
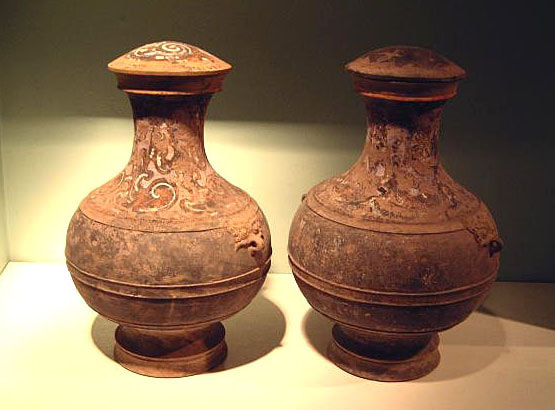
More examples from Google of possible Han Dynasty vases.
As I said, his actions is unwise and self-serving. We as artists should set an example to the world and our first job is to build, not break.
But the whole story is questionable: If the vase that he dropped in the video was fake, as some says it was, I have more reason to ask the question if any of the vases that he covered with paint are truly 2000+ years old. Then I have full reason to question any of his other works, words or actions.
But the whole story is questionable: If the vase that he dropped in the video was fake, as some says it was, I have more reason to ask the question if any of the vases that he covered with paint are truly 2000+ years old. Then I have full reason to question any of his other works, words or actions.
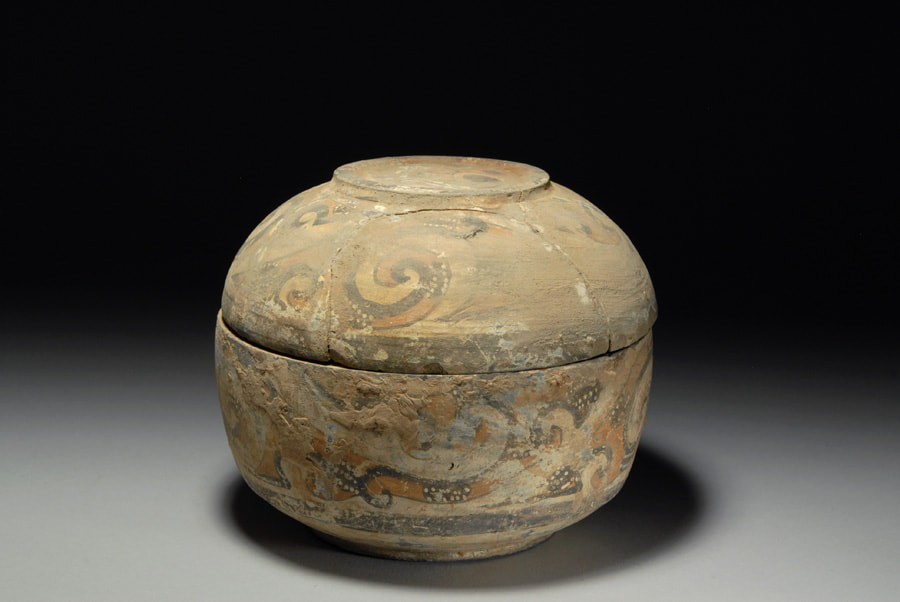
This piece is claimed to be a true Han Dynasty pot.
I, and other artists believe that honesty is the most important element of any art expression and we want people to identify with what we do.
I cannot identify with Weiwei as an artist; not when he destroys, or lie and then put a price, as reported, of a million dollars to it. There are enough people in this world that do the same in the name of activism and war.
Unfortunately we live in an age where it is difficult to build and too easy to destroy.
Caminero, who followed the actions of Weiwei and destroyed the work of the destroyer on the other hand, is just as unacceptable and he ended up in trouble ..... Weiwei, in my opinion set the example and instigated the incident of destruction in the first place. What if we all begin to follow those instigators in the name of art ......
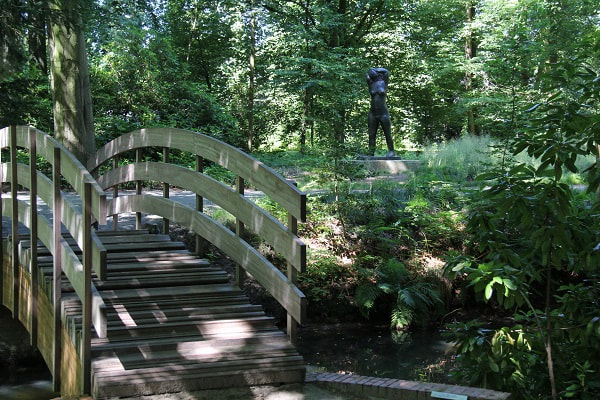
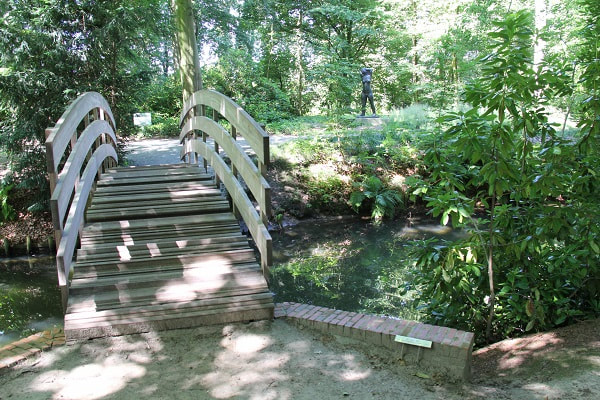
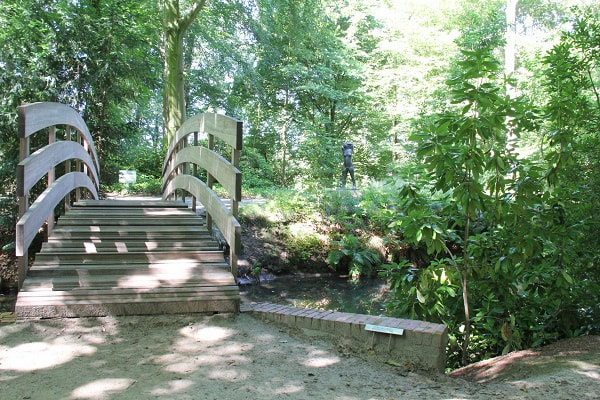
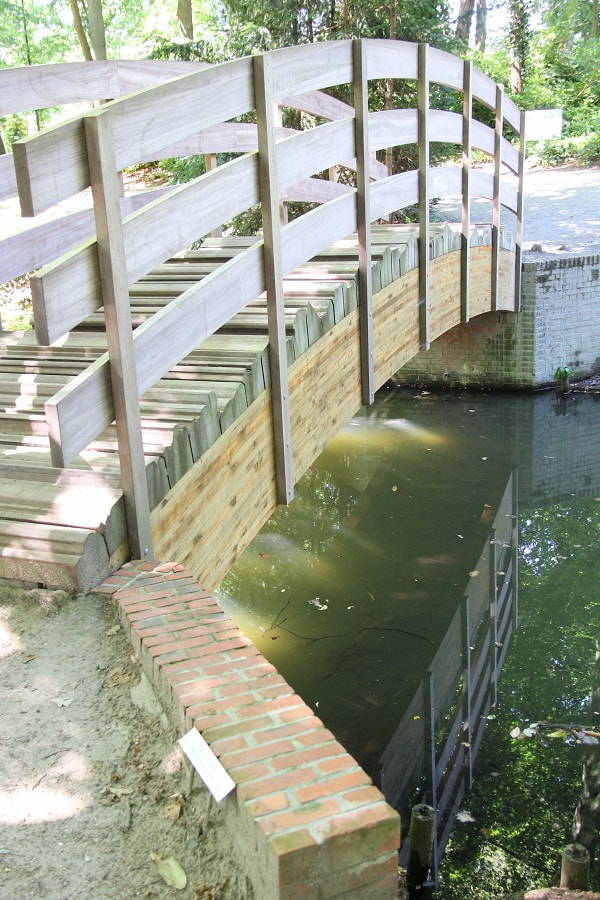
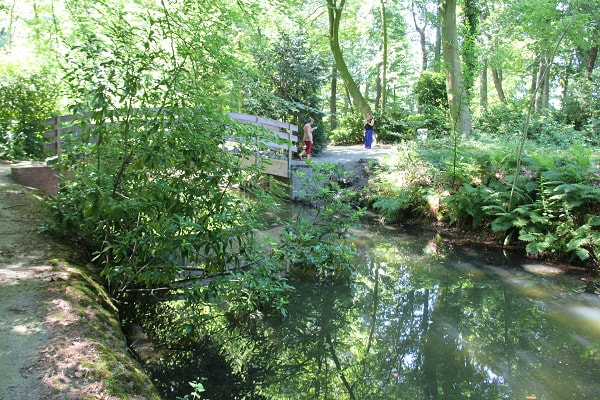
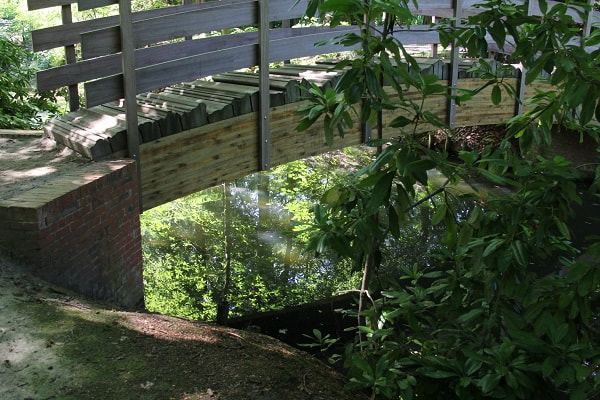
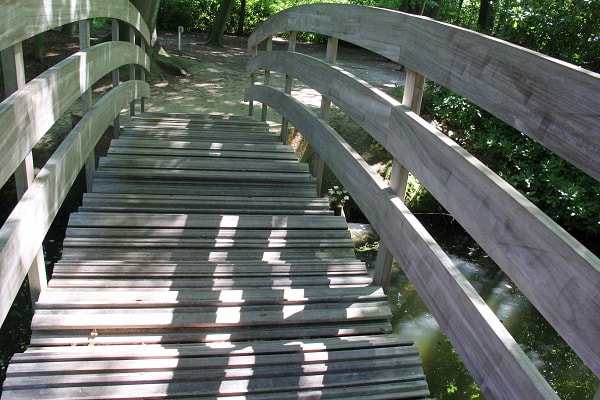
During a trip to Antwerpen in 2016 we discovered the Middelheim Open Air Sculpture Museum (Dutch Beeldentuin Middelheim Museum) and saw the bridge, designed and created by Ai Weiwei. Since then I studied his art a little more.
Unconditionally of what you and I may think, Ai Weiwei is an excellent thought provoking contemporary artist, as one can see on the images below of the bridges that he created.
I am glad that he can live in a free world where his art can be observed and appreciated, but I stand by my belief that there is no need for him to go as far as to destroy art.
What is your opinion about that?

This blog post is revised after I had to redo my website. Below are previous remarks from my readers.
Celia Waters
3/7/2014 04:53:18 am
I whole heartedly agree with all that you wrote Antoinette. And I especially agree with the point about honestly that you brought up.
Elaine Carroll
3/7/2014 05:18:54 am
Totally agree
Teri
3/7/2014 01:50:27 pm
"Unfortunately we live in an age where it is difficult to build and unfortunately too easy to destroy"
Wanted to quote you in order to add, it's too easy to copy, and control. Teri
Shawna
3/22/2014 03:43:32 am
I whole heartedly agree!!! The moment the brush hit the "antique" vase (if it was indeed antique), the item became destroyed. He was acting as painters do, who use old canvases to reclaim and paint their own image on top. I know there is a term for this, but it escapes me. What on earth would possess someone to take an antique artifact and cover it with chemical that could very likely destroy the composition of the ancient piece and ruin it forever. Irresponsible! Instead of preserving history - and ART - he is destroying them both...
Shawna
jsbarts.blogspot.com
When 2020 came around nobody anticipated it to be a year that would define the course of the lives of so many of us.
We were all hoping for a year in which opportunities that we might have missed in 2019 would come our way this time around.
I was scheduled to teach in Europe once again and my fingers were crossed to become one of the award winners of the individual artist fellowship granted by the Mississippi Arts Commission for 2021.
If I were awarded with a fellowship, I would have attended the New Members Exhibition and seminar “New Trends in international Ceramic art development”, a Biennial Congress of the International Academy of Ceramics. This would have been my first opportunity to attend this congress in the presence of a world renown group of ceramic artists.
By May 2020, all my porcelain teaching workshops in Europe were cancelled and I knew it was just a matter of time to hear that the IAC Congress would be canceled too.
The congress and show was supposed to start in Rovaniemi, Lapland and then travel to the Guozhoug Ceramic Art Museum in Beijing, China, where it would have been accepted into their permanent collection. The show was postponed, but finally opened in Beijing where it will stay now. The congress is still postponed and will be an online event in September 2021.
When I received the news that MAC approved and awarded me with a visual artist fellowship grant and I could not use it for the purpose it was originally granted, I knew that the time came in which I as an artist really had to proof that the honor that came my way was worthy to those who entrusted me with it. Afterall, we as artists are supposed to think outside the box and be problem solvers.
Under almost complete lockdown, I realized that the best approach was to look at all the aspects of my life as an artist: creating art, instruct art and as technical author. I wanted to see how I can apply the funds to all these aspects. Ironically, it did not even cross my mind to do motivational speeches and presentations with audiences as I did in the past, but the beauty is that I collected plenty of information during 2020 to use in future presentations, including my experiences and a fellowship grantee.
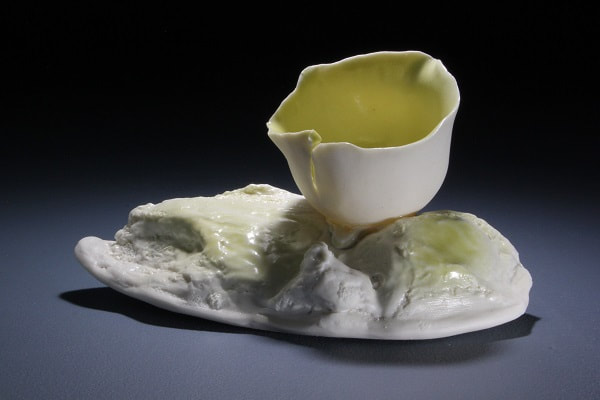
When the opportunity arose to research and write an article for the Ceramics Monthly, Parian ware was on my plate. Composing a Workable Parian Clay Body was published in October 2020
Parian ware is a type of porcelain that is self-glazing. The medium, although lovely, is very difficult to work with, since it has almost no plasticity. There are only a few people in the world that work with it.
This new information led to new opportunities for me in which I could introduce parian clay into my own work. Anytime when we as artists can connect and learn from our peers, we grow. I had the opportunity to connect with other artists in other parts of the world that was already using a commercial parian clay body or that was working with it in the form of a slip.

Art is the ability to see the world through the viewfinder of our minds eye. It is the ability to break situations around us up and to present it to an audience in a different form – Antoinette Badenhorst
My work is mostly inspired by nature: the nature of people, the nature of animals, the nature of circles, cycles, and seasons.
To grow as an artist, it is necessary for me to leave the safety and confinement of my home, my office, and my studio and to see the world through my own viewfinder.
Therefore, when the opportunity came, Koos and I packed our bags, traveled south through Alabama, the Northern parts of Florida, circling all the way into Georgia before making our way back home. While I was searching for ideas and fresh content, Koos was documenting my experiences in art galleries, museums, and natural parks with his cameras.
Although we had limited access to many of these public treasures, we came back home with lots of written notes and sketches, video clips and images.
Experience taught me not to intentionally push to express myself in art. My impressions always need to go deep into the fertile soil of my subconscious, where it is processed before it comes back as interpreted art. Most of the time, I do not even realize when information bubbles back up. It is only when I begin to analyze it after the fact, that realization hits.
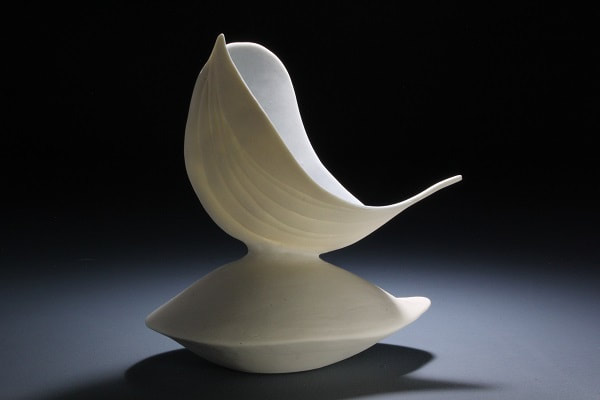
This time around, I think the concept of birds were lingering in my mind from long before we took the trip around these Southern States. The fact that I was drawn to the wetlands was probably a confirmation of where my mind was already heading for as far back as my childhood.
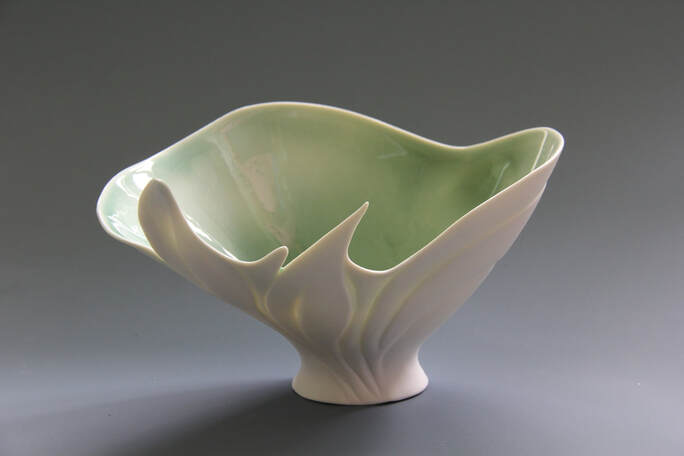
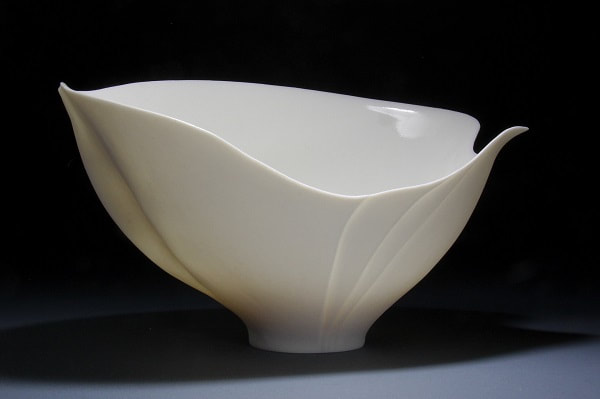
The public often interpret the lines that are seen on my sculpted bowls as leaves, flowers, birds, butterflies, or angels. I simply enjoyed the fact that I could give them the freedom to see what they wanted to see, without analyzing it in more detail. It gives me great satisfaction to give the public the freedom to interpret and after all, my theme was spelled out in statements many times before.
The public often interpret the lines that are seen on my sculpted bowls as leaves, flowers, birds, butterflies, or angels. I simply enjoyed the fact that I could give them the freedom to see what they wanted to see, without analyzing it in more detail. It gives me great satisfaction to give the public the freedom to interpret and after all, my theme was spelled out in statements many times before.
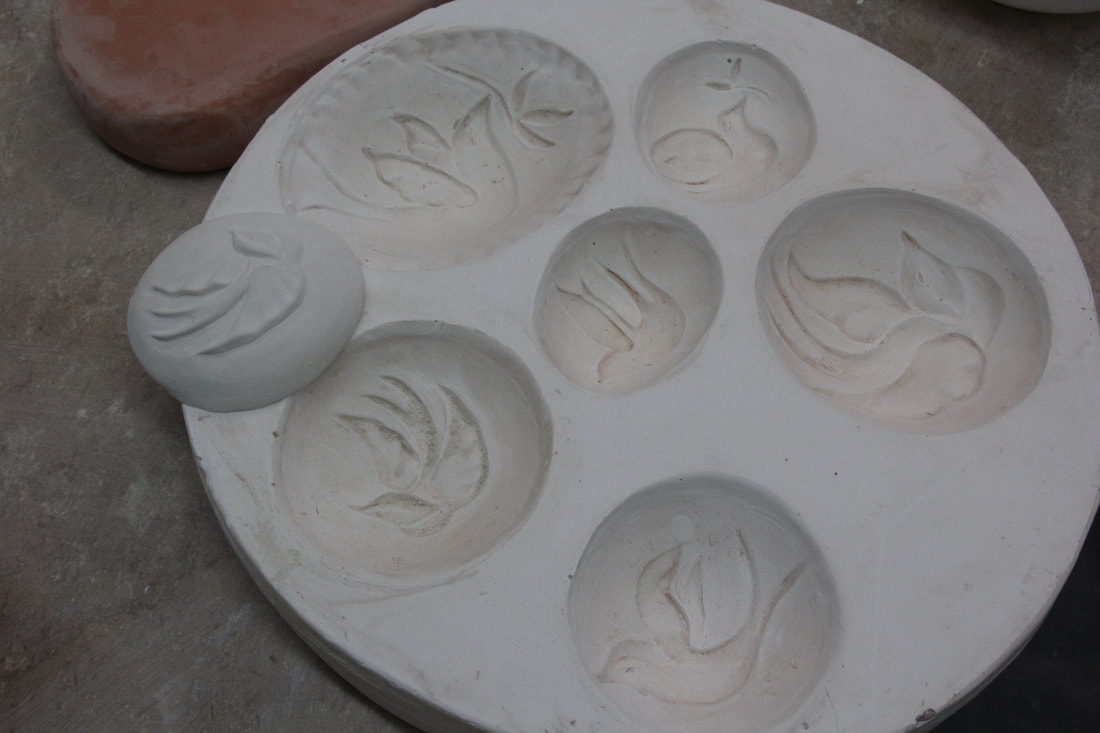
Then, with so many people in distress in 2020, I was consciously looking for ideas to encourage others around me. The swallow, which is a symbol of hope, crossed my mind and I began to research them. With the mockingbird and its melodious tunes, robins that do not fly away when I go near them, blue birds and so many other birds to observe from my showroom window, I am not surprised that people often see birds in the abstract lines of my sculpted vessels. If not full birds, there are always references to bird wings, bird feathers and forms.
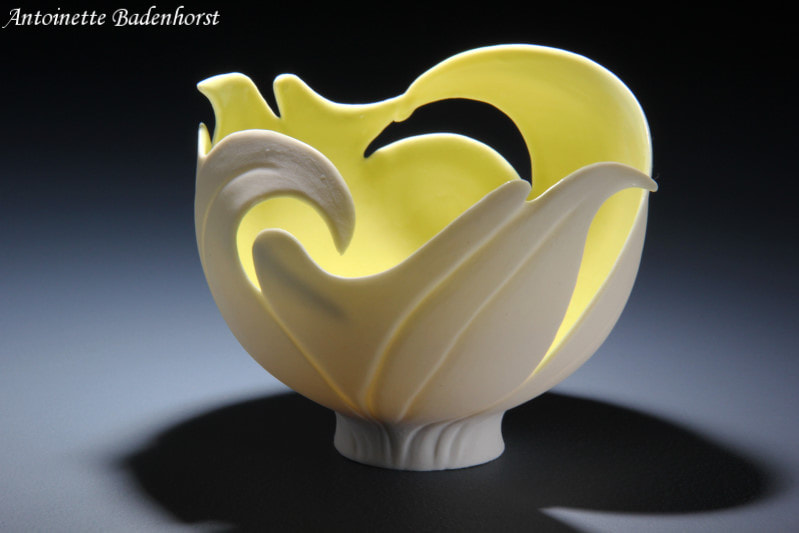
Bird wings are translucent in flight, something that I think are sometimes replicated in my sculpted bowls, especially in the rhythmic lines seen in my translucent bowls.
Birds has personality, often making me think of people. Therefore, when I was looking for themes to present an online class for schools, “The crow and the pitcher” emerged and I enjoyed it thoroughly! During this time, I did some research about crows, which are certain times of the year taking my backyard over. I ended up presenting the crow in a more whimsical way.
The idea of how we as human can relate to birds often crossed my mind and I think, subconsciously, became an idea to explore.
While making this sculpture, I was aware of the influences of the fellowship trip.
A bird in flight
Free and flow
the white light, radiant
for friend and foe
Break down to earth
to catch a prey
move on
to where the horizon
gulps it into the blazed sun – Antoinette 2020
We are social creatures that enjoy relationships, conversations, that enjoy our freedoms, that
make pairs, that love or hate, make peace, make war. We feed off each other and every once in a while, we need solitude.
make pairs, that love or hate, make peace, make war. We feed off each other and every once in a while, we need solitude.
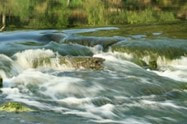
Apart from going to museums and galleries, we visited wetlands, reservations, and botanical gardens. It was the easier places to move around without having to wear a mask all the time or to fear exposure to the Covid virus. Unlike museums and galleries, it was lesser limited to certain hours and it was possible for me to collect a wealth of information, especially since the places was not crowded with people.
I also had a chance to visit a ceramic supply store. Unfortunately, I could not go into the building and choose what I needed from the shelves, but with their curbside policies in place, I brought some raw materials back home with which I could refine my porcelain clay recipes.
I think many of us would like to throw 2020 “For the birds”, but somehow, I think it is possible to take the situation and learn something out of the year. We all experienced 2020 in a different way. For some it brought opportunity, for other their lives were completely disrupted. Unconditionally of how it affected us, the response that we gave is the factor that will stay. If nothing else, we all learned to appreciate our freedoms better, but many of us learned to think outside the box.
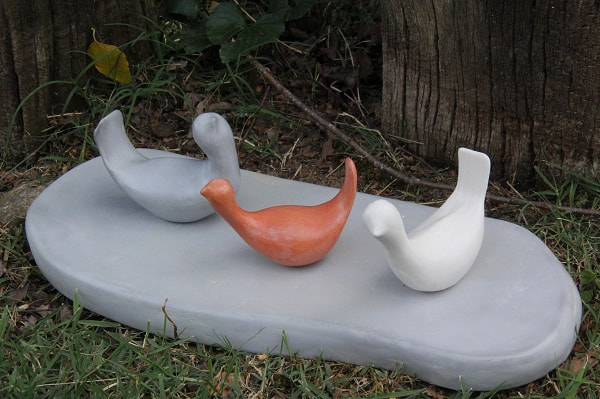
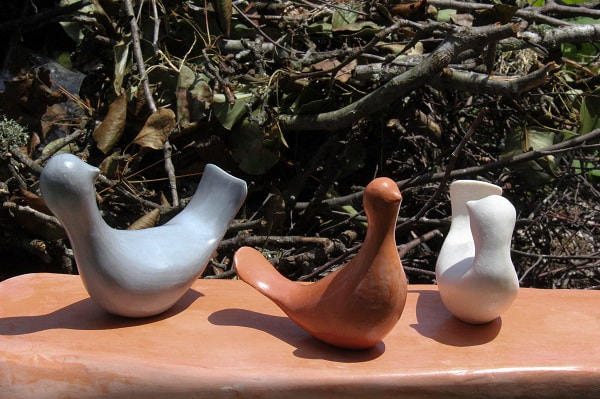
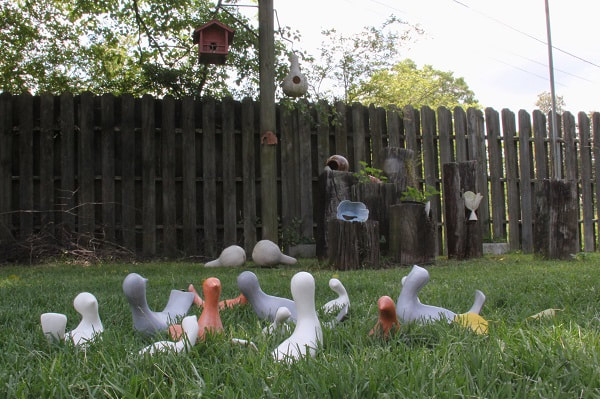
As for me, with the help of the Mississippi Arts Commission, 2020 opened new opportunities. I think “For the birds” came to stay. How it will evolve, I have to see, but for the moment I am using the bird theme to show personality and diversity.
As for me, with the help of the Mississippi Arts Commission, 2020 opened new opportunities. I think “For the birds” came to stay. How it will evolve, I have to see, but for the moment I am using the bird theme to show personality and diversity.
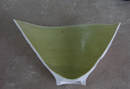
I created a more realistic sculpture project with the intent to replicate how I saw 2020. Although the birds are not abstract, they are not completely realistic either. To an extend it was a blend of experimental processes in which I colored porcelain and created Agateware, which I documented in a blogpost. It was a process that I revisited from many years ago. I was excited about the color play of birds, butterflies, and leaves and even shells that I observed, as we went through different places. I did this mingling of colored clays many years ago and enjoyed the process at the time. This time around I found the process too intentional. In the “For the birds” sculptures I used a variety of clay colors but preferred to use the colored clays separately from each other.
 |  |
This report will not be complete if I do not briefly refer to vegetation and other natural elements that normally inspire me. Nature in general will always be part of the cycles of life, and it forms an integral part of my work. Leaves, tree branches, flowers, and any other seed-like material and how it drift through seasons will always attract me. The reference to human life and the flow of events in history, either personal or public is a central theme.

It was late Fall when we were in Northern Florida. Many of the plants was already dormant or
dead. That in itself held its own attraction. The deformed and gnarled leaves in some places
reminded me of my childhood, which made me touch onto some deformed bowl forms once
again.
dead. That in itself held its own attraction. The deformed and gnarled leaves in some places
reminded me of my childhood, which made me touch onto some deformed bowl forms once
again.
The most important discovery that I made, is that it does not have to be the "big events" and "big opportunities" from which we learn. Opportunities are all around us, we just have to look for it.
I was very unsure of how to spend the fellowship funds after my plans were derailed. At first I thought to spend it on just one large item for my studio, but somehow that was not a satisfactory idea. I had the notion that I need to do something that would make me grow as an artist. Just buying an object, unless it was something with which I could experiment with, was not attractive.
When the idea to travel and look for places and areas where I can learn dawned on me, I was still unsure, because of the state of the pandemic. despite that I decided that there will never again be a time like that in my lifetime. 2020 offered me a unique opportunity to see the world from behind a mask, from a social distance and in a timeframe when people behave in a different, abnormal manner.
I mentioned that birds were always kind of in the background of my work. People often made comments that I was creating birds. I saw it as their interpretation of the signature lines on my work. Even during the documenting on video, I enjoyed the birds, but did not pay much attention to them other than their 3-dimentional forms, in the same way as I saw leaves and flowers. It was more a matter of what happens to these vegetation or birds in the cycle of life of nature and how do that compare with human life. Back in my studio, the bird suddenly had a personality. I started seeing attitudes from these little feathered friends.
I may have had that in the back of my mind from earlier last year when I was doing an online classroom project for the Mississippi Whole Schools program: "The Crow and the Pitcher"
I was also teaching a beginner’s class for potters online last year and the whole project was built on birds, bird feeders and bird houses. Those were strictly craft projects, but I cannot help but wonder if the seeds were already germinating earlier on.
Right now, I do not want to make too much of the bird idea, since it can easily become too intentional, but I will allow the idea to grow by doing more research about these little creatures.
“To fly and flow”- Wheel thrown, altered and carved. Antoinette used raw material, bought for her studio to refine her own porcelain clay recipe. The result is very satisfactory and may put Antoinette in the future position to market her own clay body to fellow Americans.
the chirping of the black birds
announces the beginning of spring
Beaks cutting deep to catch a worm
voices shrill with excitement
to tell their stories from the other side of the world
to anyone who wants to hear,
while those that was here all winter just listen – Antoinette 2020
So ask yourself the question: Was 2020 "For the Birds" For me it was really for the birds.....let's make it work!
 David is one of the instructors at Teachinart. See his profile here: Click on the image to go to his profile.
 Kilns suitable for porcelain
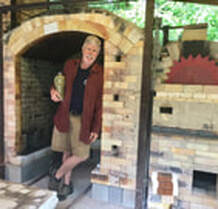
Now that we established the concept of what porcelain is and how it differs from high firing to low firing porcelains, it is easier to decide what is a suitable kiln to have. The picture is of David Voorhees at his kiln. If you are a truest, believing in only high firing of porcelain, you may also just believe in wood firing, the original firing process in which porcelain was developed in the days that it was still a secret known only to the Chinese.
If you are only looking for a strong good and reliable clay experience with the true appearance and qualities of porcelain, any cone firing from cone 6 to 10 should work. Beyond those two firing temperatures, your challenges get bigger.
| Firing higher than 1285 C (2345 F), requires stable fluxes to work in relation to the refractory silica and kaolin and catalyze it to melt the clay to glass, but to still allow it to retain the form. To my knowledge there are no support for electric pottery kilns that goes that higher than ^ 12- 14 (if you know of any manufacturer that create ^14 and above electric kilns, please share the information with me) | 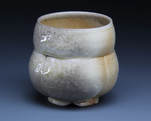 Pot by David Voorhees |
Going below 1220 C (2228 F), can be fired in any pottery kiln, but at this stage the fluxes must also be able to melt at that lower temperature. That is very possible, especially with frits, a factory produced flux that is expensive, but readily available. The problem is that silica and kaolin are both highly refractory, unwilling to melt at such a low temperature. Therefor the heating process must be even, allowing for an even spread of heat and even conversion of silica throughout the mass. Neglecting this process will lead to a surplus of free quartz that will weaken the final ceramics, in this case porcelain. A balance between time and heat, which is possible to manage in a longer cycle of a high firing process, will be more challenging in low firing, which is normally shorter. Therefor an atmosphere of a slow enough firing cycle is needed to allow for and even mingling and integration of silica and alumina with the fluxes at a lower temperature.
 One of the clay tests that I did in which the flux was too powerful.
 The best comparison to the process, is a cake, baked golden brown on the surface but with an unbaked interior.
A fine balance of raw materials is needed, complicating the recipe and the chances that one of these materials, may become unreliable when changes in the mining process takes place.
To obtain translucency at such a low temperature requires more glass-maker and just a small amount of clay, which forces the clay into a less pliable state. Bentones (macaloid, bentonite vee gum T), may be the only solution to improve workability, but these plasticizers bring its own set of possible problems, a topic that falls out of the scope of this post, but that may be discussed in future.
It may be a good time to refer back to soft paste porcelain Chicago images, which is traditionally not as strong as hard paste porcelain.
Anyone interested in working with clay should choose the medium and firing requirements first and then decide on which kiln to buy. Porcelain, in general do have its own requirements for firing, whether it is a high firing or low firing porcelain. I describe some of these requirements in the blogpost "Slow firing of porcelain in a pottery kiln".
It often requires down-firing. Frank and Janet Hamer described it in “The Potter’s Dictionary of Materials and Techniques” as “a thick body-glaze layer”. Due to its glaze-like nature, described in by as “a thick body-glaze layer”. Due to the fact that the clay and glaze matures at the same time, it builds a very strong bond by the clay body compressing the glaze. A simple explanation is that the clay prevents the glaze from stretching too much, prevent it to craze, thus the stronger bond. Too much compression will cause shivering.
 Terra sigilata shiver off the clay body | Shivering of the fired glaze will take place when contraction of the clay is severe, appearing like a paint chip, reveling the clay below. The underlying problem is similar to crazing in which glaze and clay body do not fit together. |
| Crazing happens when glazes cool down too fast and contracts faster than the clay itself. This is the exact reversal of what happened when it fired up and often referred to as a bad clay/glaze fit. Cristobalite (silica crystals) in the glaze contracts more than 3 %. | 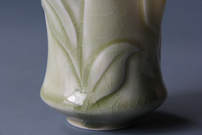 Porcelain cup with crazed glaze. |
 Note the seperation in the bowl from the glaze. In this case the glaze application was too thick. | Dunting is the process in which the cool-down process is happening too fast, causing stress in any dense pottery. The upper part of the pot may start to cool faster in the kiln atmosphere than the base that touches the shelf below, which is cooling much slower because it retains heat longer. Uneven contraction resu |
Porcelain is considered a dense ceramic material, as it contains 10% +cristobalite from silica present in the clay. Body and glaze contract together during the cooling, compressing it into a strong bond. If the critical cooling periods around 573 C (1063 F) and again around 226 C (439 F) when free quartz and cristobalite needs to contract in concert with each other at the same slow rate, is not slow enough, the tension build up will weaken and break the body in two, many times long, sometimes even weeks after the work is cooled.
| In the USA and in many other countries that I visited before, are many manufacturers, making high quality electric pottery kilns. Unless poorly designed, any of those should be suitable to fire porcelain. Higher firing, refractory materials for kiln bricks and kiln furniture may be used for cone 10 kilns, maybe allowing to last a little longer when it is used at lower temperatures than the temperature it is intended for. Due to the need to control the cooling of porcelain, it may be wise to buy a kiln that has the facility to control the firing down process. Electronic controllers are very handy, but a potter can also make sure that all vents are properly shut closed after the initial cooling in the kiln started to happen. The kiln will reach a temperature around 1000 C (1822) when the kiln turns to a yellow orange color, which is a good time to close all possible vents, prevent drafts and instant cooling in the kiln. Resist the urge to open the kiln when the heat is above 200 C (392 F) and even then, prevent sudden airflow into the kiln. It is not worth all the trouble and long hours, just to see how a fine piece of porcelain fall apart on the kiln shelf, or worse, weeks after you sold it to a valued customer. |  Kiln controler to make sure the speed of the firing is under control. |
Low fired Porcelain by Bryan Hopkins.
I am sure you will know what I mean when I say that decisions can sometimes cause big storms in one’s life. Koos and I put our house in Illinois on the market in late August and had it sold 2 weeks later. In these economic times that is almost unheard of, so when it happened, the storm was on and it came like a tsunami down on us. We had to move out of the house in less than 2 weeks, because the initial closing date actually happened on time and was not delayed like it so often times happen.
Three truckloads further and Koos and I find ourselves back in the first house we bought in Saltillo Mississippi and that was rented out while we were in Illinois. Now we have to make it home again and my studio needs a serious revamp after termites got hold of it.
Three truckloads further and Koos and I find ourselves back in the first house we bought in Saltillo Mississippi and that was rented out while we were in Illinois. Now we have to make it home again and my studio needs a serious revamp after termites got hold of it.
Example of pottery from my factory.
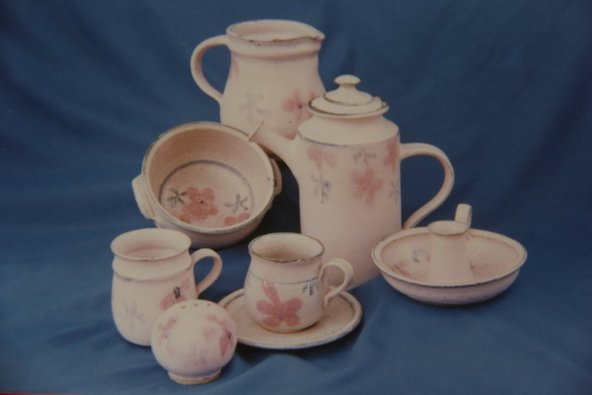
Stoneware dinnerware with flower pattern from Antoinette's early pottery production lines
In 1987 we made a similar move, except that our children were small and I was just past the beginners’ phase of my pottery career.
The University of Pretoria recruited Koos to work for them. We were sad to leave beautiful Malelane behind, but we realized that there were several advantages in moving to Pretoria. We were young and today we know the grass always seems to be greener on the other side.
I started teaching pottery classes again, but also took the opportunity to attend pottery workshops. It was great to enroll in a pottery class as a student and learn from masters in the field.
Every artist dreams of the day that he or she will make it big, so I was happy that I could sell more pottery. At this stage I did not consider myself as an artist. I was good at teaching and I was good at making pottery. I even got to the point where I started to understand the chemistry of ceramics and could make my first glazes.
One of the things that is often overlooked by artists and which should be addressed more often in college courses, is the art of business and how to work yourself gradually to a place where you can earn an income without allowing that the business to consume your whole life . I was completely ignorant in that field and the perfect candidate to fall into a trap.
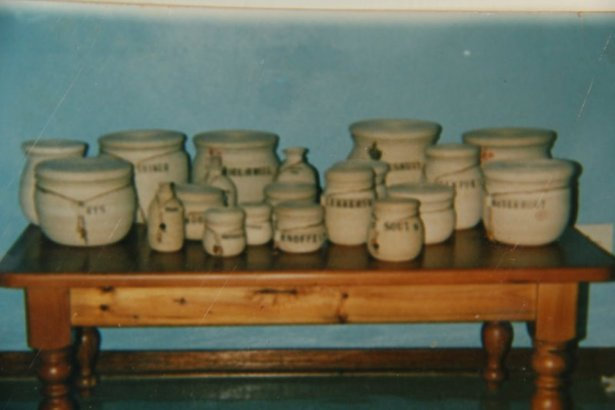
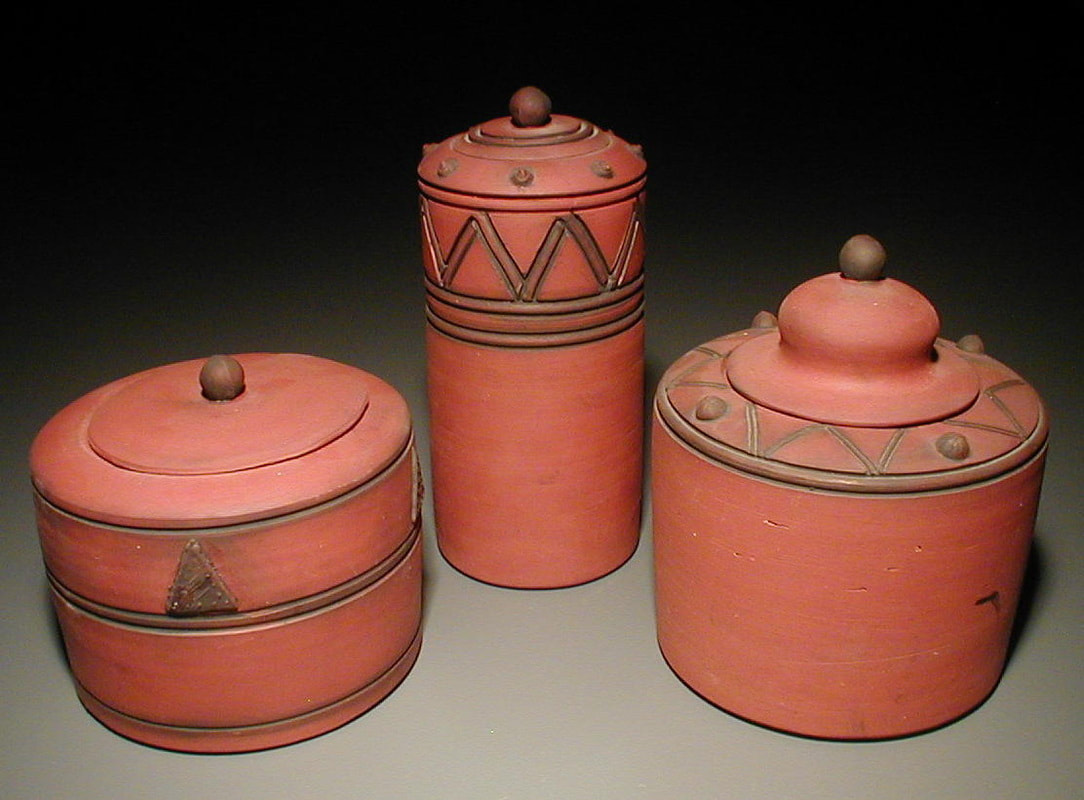
This was my very first series of canisters. It was a speckled clay, due to iron in the fire-clay that I used. The interiors were glazed. A label was added with lettering pressed into the clay and washed with manganese oxide. It was finished with rope and wooden beads.
My first series of pots were unloaded from my kiln one day and I was very excited about it. When I had an opportunity to show my work at a big show, I got an order within 3 days that was bigger than I could handle. I was totally freaked out, but instead of working my way through the situation, I turned my attention to buy a factory. All signs indicated that I should not buy the factory, but at the time I was too close to the problem to think clearly and after one year, a crooked partner and lots of heartache I was back home with just my one wheel and small kiln.
In looking back at the situation, I learned a lot; not only about business, but also about managing the 20 people I had working for me at the time. I learned how to plan and schedule the production of hundreds of pots per day, sometimes jumping in and working side by side with my employees. The hardest, but maybe the best lesson that I learned was that I loved pottery and not wanted to be a manager of potters.
The aftermath of the factory was difficult. I had a lot of self-doubt. My children, still very young at the time suffered with me and my husband were stressed out to his core. He co-signed for the factory and lost everything because of my crooked partner. With a very demanding job, it was not good for him to worry about me and the children.
As with all things, life went on and soon we were back on our feet. I restarted my teaching studio and our lifes resumed as if nothing happened. I became a very successful teacher and not only did I write my first articles for a newspaper, but soon thereafter I won my first pottery award. As a family we were content and happy.
At the time the winds of change were already blowing viciously over our beloved South Africa. Nelson Mandela was the new president and although everything seemed to be peaceful, thousands of professional people started to leave the country; either because they lost their jobs or because of fear that they will lose their job. Little did we know at the time, that we would soon follow in many other's footsteps. We just had to make a little detour through Namaqualand and Cape Town, before we would, in 1999 also find our way to the United States.
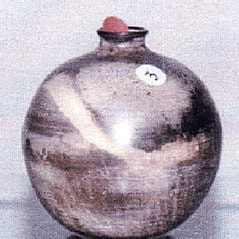
I experimented earthenware clay with African designs before we left South Africa. I was trying to find a niche between porcelain, red earthenware and pit fired porcelain.
This was my very first award winning pot in 1994 (or 95). Unfortunately this is the only image I have, so I apologize for the quality.
Business tips for pottery
- It is very important to know what you want to be. Do not be a potter or artist because you think it is a moneymaker. It is not. It is extremely hard work and if someone tells you that the life of an artist is an easy one because they can get up and play their life away, do not believe that. You have to be extremely disciplined to be your own boss and the hardest thing to do is to find inspiration when you are tired and the money coffer stays empty.
- Find your voice and your own niche. It is difficult to do while you are still a beginner and after all how will you learn if you do not copy others. You have to separate learning to do art work from doing business in art.
- The easiest way to stay on that track is to be honest with yourself. Sit down with pen and paper and write down subjects that interest you. Tear pages from magazines of things that catch your eye and find the common elements that you like in those pages. Incorporate those ideas into a workbook. Keep notes and transfer ideas to your artwork.
- Have the discipline to work regular hours, eat and exercise enough and to maintain a good lifestyle.
- Once you have a style and maybe a series of work, you have to learn how to market it. Bruce Baker offers a series of CDs in which he discusses important rules for the creation of images of your work and things you should know to set yourself up for success at different shows. He also teaches some selling techniques. It is of no use if you make beautiful work and you cannot get rid of it.
- Know and understand your market and do not fall around from one style to the other.
- Make sure that you have a well worked out proposal with business cards, images, an artist statement, resume and biography. It is important that you know why you are doing what you do and make sure that others can learn that by looking at your proposal.
- It is difficult to make money if you do not have money to start with. I want to encourage you to read my blog “The beginning of my pottery career” One of the nice things about artists is that they are problem solvers. I heard a story about a guy that was working off the side of the road………ahmm………. but wait I am jumping the gun here; that story is part of an interview that I had with a fellow potter. I will post that shortly, so check back if you’re interested to hear it…….
- An artist without at least some basic computer skills will survive with difficulty in today’s world, since social networks have mostly taken over as the advertising tool. It is a fast and effective tool to use. Use it sparingly, but wisely.
- I’d love to hear your personal stories of survival and if you have any business tips to share, I’d absolutely welcome that. Thank you for reading and sharing my blog.
The online workshop "AMAL": All artists makes a living by Curtis Benzle is available on TeachinArt
Comments from my former website
Elizabeth Hoffmann
1/21/2014 12:16:36 am
Great inspiration
Reply
Antoinette
1/22/2014 11:53:28 am
Thank you Elizabeth. What do you do?
Reply
Using Ceramicslink
3/18/2014 12:24:31 am
Great post! Been reading a lot about this kind of work recently. Thanks for the info!
1/21/2014 12:16:36 am
Great inspiration
Reply
Antoinette
1/22/2014 11:53:28 am
Thank you Elizabeth. What do you do?
Reply
Using Ceramicslink
3/18/2014 12:24:31 am
Great post! Been reading a lot about this kind of work recently. Thanks for the info!
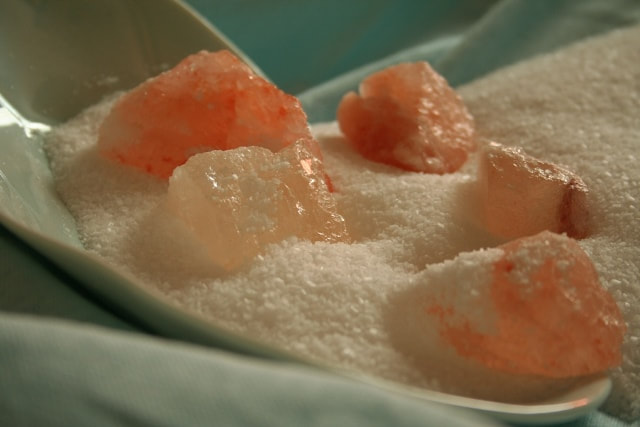
Regular table salt mixed with Himalayan salt chunks
There’s a container with salt sitting next to my stove top. The last time that Linkie, my celebrity chef daughter visited me, she bought me some large chunks of colored rock salt in a gourmet olive tap.
The little grater that was included in the packet made me try to shave the salt once, but then I decided it is enough that it look pretty on the kitchen counter, partially covered with kosher salt, which I like to cook with. Now I enjoy looking at my “rocks surrounded by white sand” and imagine a perfect life.
The little grater that was included in the packet made me try to shave the salt once, but then I decided it is enough that it look pretty on the kitchen counter, partially covered with kosher salt, which I like to cook with. Now I enjoy looking at my “rocks surrounded by white sand” and imagine a perfect life.
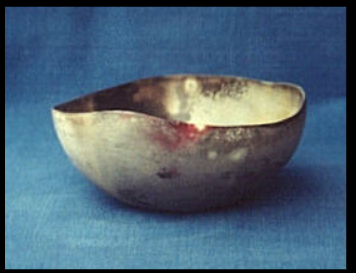
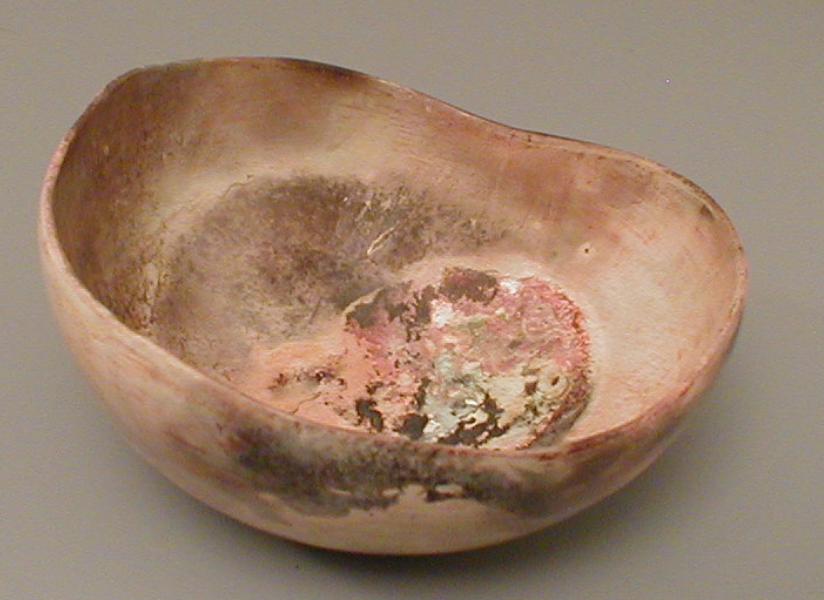
Pit fired porcelain pinched bowls by Antoinette made in early 2000's
I don’t know about you, but I use kosher salt all the time, for no other reason than that I like the taste. It is a little harder to put too much salt in one’s food. I add salt in anything; even when I make something sweet, I have to add at least a pinch of salt. I cannot imagine a salt-less life.
As I am standing there, stirring the pot on the stove top, my thoughts trail off. I’m thinking about what Scripture says about salt. Even if you are not a Christian, you have to admit there is beautiful poetry in the Bible.
“For everyone will be salted with fire.”
“Let your speech always be gracious, seasoned with salt, so that you may know how you ought to answer each person.”
Then there are all the different uses of salt that is totally unrelated to food. There are so many medicinal uses for salt….remember how fast a wound heal when vacationing at the sea….
One of my favorite uses is for cleaning red wine and also for fresh blood stains. Pour a heap of dry salt on a red wine spill on a carpet or couch and to let it sit till the next morning. Vacuum the wine saturated salt away and the spot is gone. When blood gets on clothes, let it sit for a while in cold salt water, before rubbing the stain out.
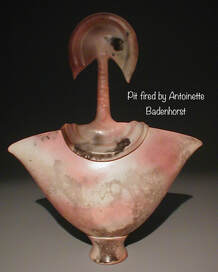 From the Woman series Made by Antoinette in 2003 | 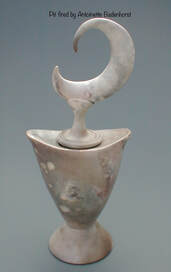 African Pit fired series by Antoinette made in early 2000's |
My musing on salt will be totally incomplete if I do not trail my thoughts through my studio and the uses of salt there. As a young potter I could not believe my eyes that common table salt is useful in pottery and I remember the day that I dropped a pinch of salt in a bowl to see what would happen in the kiln fire. I thought I totally misunderstood my pottery books and had to see for myself and there, as sure as the sky is blue, the pot came from the fire with a darker, shinier interior.
That was the day that I realized that clay has many more domestic components to it than I originally thought. I also realized that salt is a very basic, but very diverse material.
As the years went by, I used salt in my pit fire. I arranged the salt and copper around the pots that were nested in sawdust and I put on fire. Once it burned down, the fumes created beautiful reds and oranges on my pots.
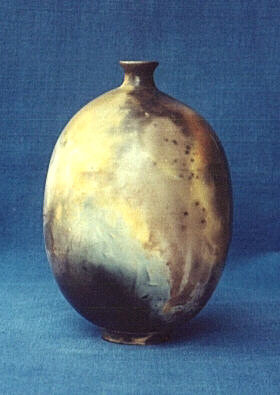
Award winning pit fired pot George O'Keefe Museum 2000
What is salt or soda firing? How do these firings differ from each other?
| Salt (sodium chloride) vapors is formed when salt is introduced into kiln firebox at high temperature and so the sodium combines with silica in clay surface to form a hard sodium-silicate glaze. Salt vapors are toxic when inhaled. Soda (sodium carbonate, or soda ash) firing is similar, but safer than salt firing. In an atmospheric firing (reduction) sodium bi-carbonate, also known as baking soda (the most regularly used in households is Arm and Hammer) is introduced into the kiln firebox when the temperature almost reach ^ 10 temperatures (1280 C 2350 F). Nan Rothwell |  |
Blog
Categories
All
Agateware
Arts Integration In Schools
Begin A Pottery Business
Clay Flute
Clay Slabs For Dinnerware
Destruction Of Art Or Creating Art
Figurines
Kilns Suitable For Porcelain
Kitchenware
Mississippi Arts Commission Fellowship Report
Ocarina
Pinching Clay
Porcelain Tips
Porcelain Workshops
Pottery In Pretoria
Salt In The Pitfire
Throwing On The Pottery Wheel.